Game Development Reference
In-Depth Information
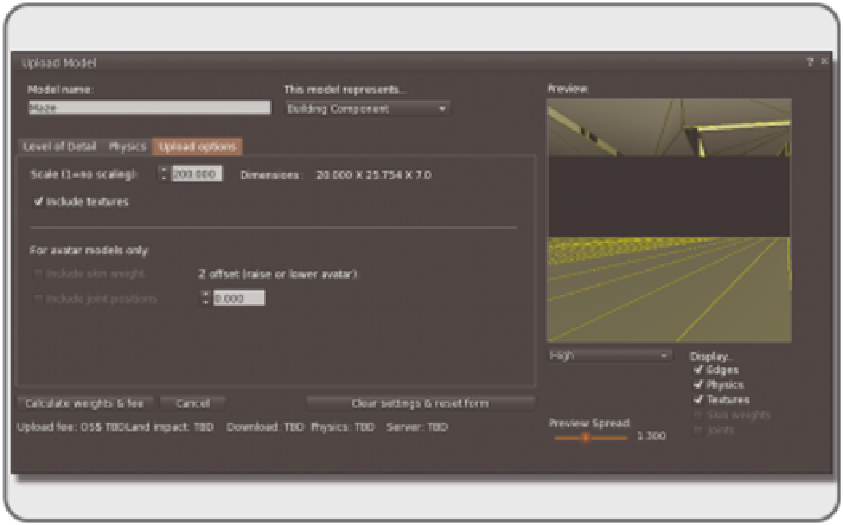
FIGURE 13.17
Screen grab from OpenSim showing the Upload Model menu, the Tab for Upload Options.
13.6.7 l
ooKing
aT
The
m
odel
i
nWorld
When the model appears in your inventory, drag it down onto the ground near you as shown in Figure 13.18.
Take a walk around the maze and see how it feels. You are doing great. Now, let's look at the results of the
other side of the prototyping process: the creation of a real solid model.
13.6.8 s
ending
The
m
odel
To
Be
3d p
rinTed
To send the model to be 3D printed, you will need a printable ile, which can be exported from SketchUp using
the STL ile plug-in or from another 3D modeler like Blender to other ile formats the 3D printers will recognize.
Shapeways (http://www.shapeways.com/) has a good system and online printing service, and you can
even share the model with your build group via the Shapeways website. There are also many other 3D
printing services, such as Sculpteo, 3ders, and i.materialize. Find the one that works best for you. Once the
model has been accepted for printing, you will decide on the appropriate material to make the irst one. One
of the less-expensive materials is probably a wise irst choice, although it may not have as much idelity or
allow for superthin walls. When you get your hands on the real model of the prototype, take a picture of it
and share it.
As you can see in Figure 13.19, the ceramic version of the maze turned out well; all you need now is a
tiny avatar to put inside it. Note that the walls were thickened to accommodate the ceramic material used to
make the prototype.
Here are some additional things you may want to try: Make a machinima of a walk-through, stage a
scene, or have a party. Play with the scale, try several models: one in real-world dimensions based on a
6-foot person, one in virtual world scale for tall avatars, and one for tabletop display in the virtual space.