Game Development Reference
In-Depth Information
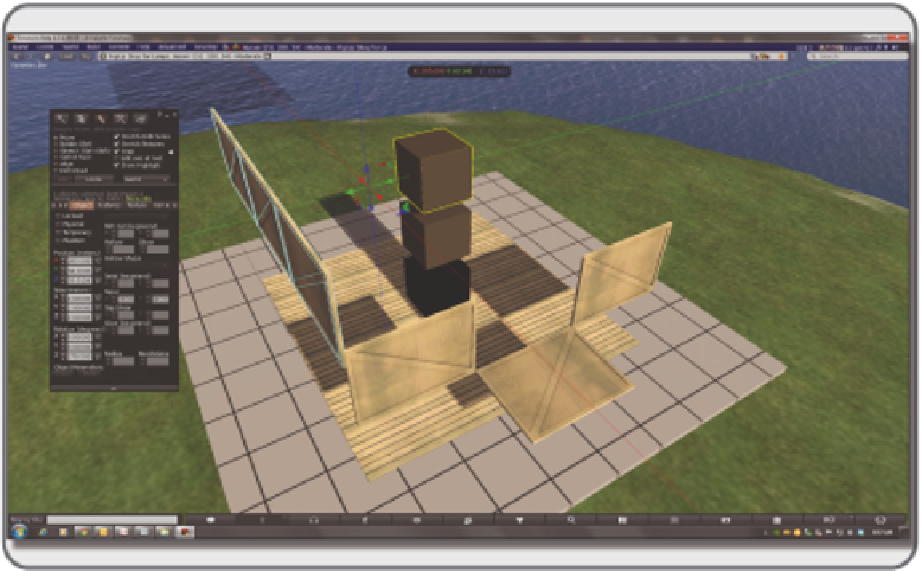
FIGURE 10.11
Screen grab showing the use of alignment cubes to assemble the loor, walls, and front door of the
Pop-up shop.
other, check to make sure that the alignment cubes are the key prim on these elements. As you know, this is
indicated with a yellow outline when you have the linked object (a wall section, for example) selected in the
Build/Edit menu. If the .dae model iles have not uploaded into your virtual environment with the alignment
cube as the key prim, go into the Edit Linked mode (check the box on the Build/Edit menu), and unlink the
alignment prim. Without moving it, deselect everything by clicking on the ground or sky. Now, re-select the
model, and then the alignment cube, and link them back together. The cube should now be the key prim, and
show a yellow highlight, while the rest of the model is highlighted in blue.
Do not unlink the parts of these walls until you have the whole shop assembled, want to remove the align-
ment cubes, and/or you want to make a hole for a window or doorway in the shop walls or ceilings. Since the
shop elements are modular, you can always expand the shop ininitely, until you run out of land, of course.
10.7.2.1
Setting Up the Shop Floor and Walls
1. Drag the Pop_UP Shop_Floor object from your inventory and set the center in the same coordinates
as the center of the foundation prim you have on your parcel. Reset the alignment cube to be the key
prim for the Shop Floor, if necessary.
2. Drag Pop_UP Shop_Front_Wall object from your inventory onto the foundation in your parcel, reset
the cube as the key prim if neccesary, and align it properly with the loor at the front of your shop,
using the same coordinates as shown in Figure 10.11. The front wall has a ramp on it, the other walls
are closed and lat.