Graphics Programs Reference
In-Depth Information
8
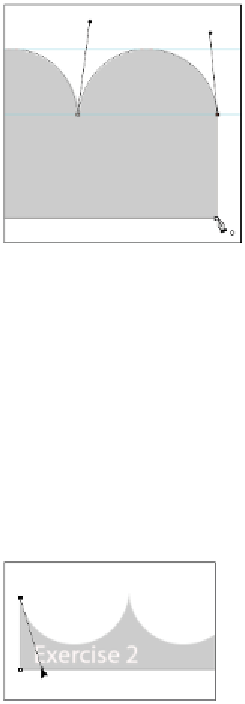
Before you release, press and hold the Alt/Option key. This creates the corner anchor point on the fly;
you can now drag upwards to create the next arch. Using this method helps keep the task of creating a
path quick and efficient.
9
If you are not at the end of the arches, continue creating your path until you are at the end and then
Alt/Option+click your last point. It might not look like a curve point; this is because you created the
last anchor point while dragging down.
10
Press and hold the Shift key and click your starting anchor point. A circle appears to the right of your
cursor when you hover over the anchor point.
Click the original anchor point when you see a circle appear to the right of your cursor.
Now you will move on to the next exercise. You will not be taken through every step as you were in the
initial exercise; much of the techniques you will use in the next exercise are similar to what you have just
learned.
1
Press Ctrl+0 (Windows) or Command+0 (Mac OS) to fit the image into your work area.
2
Click and drag a guide the horizontal ruler at the top and drag it down to the tips of the lower Exercise
2 shape.
3
Using the Pen tool, click the lower-right corner and then Shift+click the lower-left corner.
4
Click the upper-left corner. Zoom in to the first downward arch.
5
Click and drag downwards to create the directional line for the arch that is going down.
Click and drag down to create the directional line for the downward arch.