Graphics Programs Reference
In-Depth Information
7
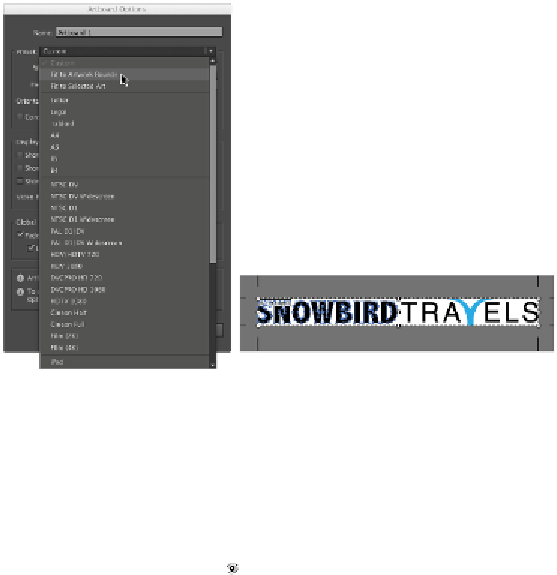
From the Preset drop-down menu, select Fit Artwork Bounds and click OK. The artboard now fits the
new position of the artwork.
Change the Artboard Options to fit Artwork bounds.
The artboard changes to fit the artwork.
8
Choose File > Save, and then File > Close.
9
Return to Photoshop to see that the artwork for the logo is automatically updated.
10
Select the Move tool and reposition the text and the logo to better fit into the image. No exact posi-
tion is necessary.
11
Click the Visibility icon ( ) of your Rectangle 1 layer so you can see the full image composition.
12
Choose File > Save. Keep your file open for the last part of this lesson.
Saving your file for use outside of Photoshop
If you want to keep your artwork and text in vector form, you should keep your file in the Photoshop
format. You can choose File > Place to import native Photoshop files into most of the other Adobe Creat-
ive Cloud applications. If you are saving to an application outside of the Creative Cloud, you might have
to choose a different format.
In the last section of this lesson, you'll save your file as a Photoshop PDF.
1
Choose File > Save As. When the Save As dialog box appears, choose Photoshop PDF from the
Format drop-down menu. Type the file name
advps09_logo2
into the Name text field and make sure
that you are saving into the advps09lesson folder. Leave all other options at the default settings, and
then click Save. If a warning appears about the PDF Settings, click OK. The Save Adobe PDF dialog
box appears.
2
Choose the Adobe PDF Preset of High Quality Print. Leave all other settings at the default settings,
and then click Save PDF.
If you see a warning about Preserving Photoshop Editing Capabilities, click the check box that indic-
ates that you do not want to show the dialog box again, and then click Yes.