Graphics Programs Reference
In-Depth Information
Click and drag up to lighten the selection.
Note that only your selection is changed.
4
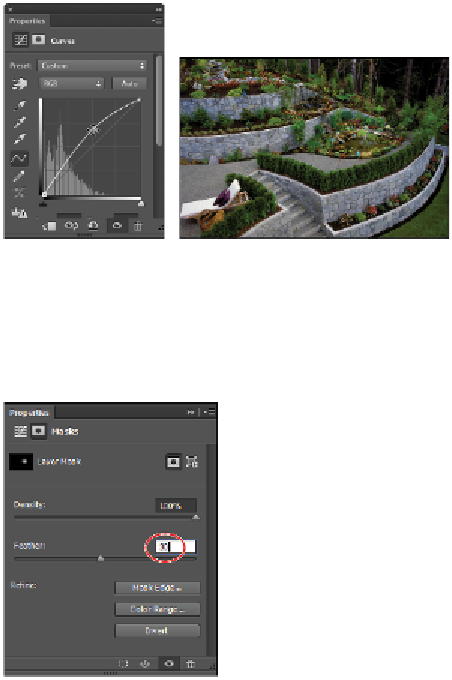
Click the Masks icon located at the top of the Properties panel to see your selection options.
5
Click and drag the Feather slider to the right until you have successfully removed the hard edge and
blended your curve change in the image. In this example, the feathering is set to
30 px
.
You can feather the mask for the adjustment layer at any time.
Notice that your mask is shown in the Curves 2 layer in the Layers panel. You can also see that your
image is affected wherever there is white on the mask.
6
Select the Paint Brush tool and press
D
to make sure that your foreground color is white and your
background color is black.
You can switch foreground and background colors by pressing
X
.
7
Position your cursor out on the image so that you can see a preview of the brush size. If you see a
crosshair instead of a circular preview of your brush size, you most likely have your Caps Lock key
on; turn it off to see the brush preview.
8
Press the right bracket key (]) repeatedly until you have a brush that is a larger. No exact size is neces-
sary.