Graphics Programs Reference
In-Depth Information
Moving Edits in the Timeline
You may have noticed when you use the Pointer tool to slide a clip to a
different location the effect is that of an Overwrite Edit. It is also possible to
move edits around in the Timeline, using the Pointer tool, and at the same time
perform an Insert Edit.
To perform an Insert Edit within the Timeline it is crucial to press the keys in the
correct order.
■
1
Using the Pointer tool highlight the clip you wish to move and release
your mouse button.
■
2
Press and hold down the Alt/Option key and click once again with
the Pointer tool on the clip you wish to move. Reposition the clip by
dragging and release your mouse button at the point where you want
the clip to be inserted in the Timeline.
This time the result is that of an Insert Edit. The clip you have moved is
repositioned and all edits in front of it move forward in the Timeline.
You may notice that the clip has been inserted where you specified in the
Timeline and that it also remains in its original position.
To remove the original clip, highlight it and press the delete key. This deletes
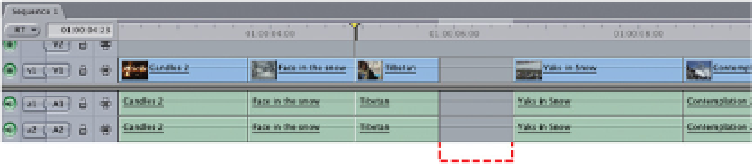
the clip from the Timeline and leaves a gap where it previously existed.
Gap Where Clip Has Been Deleted
To get rid of the gap hold down the Control key and click in the gap with your
cursor - this opens a dialog box with several options - select Close Gap and
the gap will disappear.