Graphics Programs Reference
In-Depth Information
Insert and Overwrite Editing
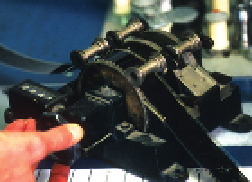
Think of the old days when film was edited in a
cutting room. The editor would take two pieces of
film, line them up in a splicer and join them
together. As more pieces of film were cut together
a Sequence was formed. As more Sequences were
crafted these were joined together to build completed scenes until finally titles
and effects were added. Once all the scenes were completed the final result
was a finished film.
When putting the pieces of film together the editor had two choices: either a
piece of film was added to the shots already cut together and therefore the
overall length of the Sequence was increased, or a piece of film was placed
into the Sequence and a corresponding amount of film, the same in length,
removed - thus the overall duration did not change. These two choices are
what Insert and Overwrite Editing are all about.
When you build your movie in Final Cut Pro you edit various shots together.
Whenever these shots are put together you must decide whether you are
adding a shot to a Sequence and therefore increasing the overall length of
the movie, or, whether you wish to simply replace a section with another
shot previously not included (thus keeping the Sequence the same in
length).
When editing with a non-linear system such as Final Cut Pro the editor has a lot
more in common with the film editors of yesterday than the tape editors of
recent times.
Getting Started with Editing
■
1
Check that you have a Sequence open. If you can see the Timeline in
front of you then a Sequence is already open. Your Sequences are
stored in the Browser, the same area where your clips and bins are
kept. If a Sequence is not open double click a Sequence in the Browser
and the Timeline will appear.


