Graphics Programs Reference
In-Depth Information
10
Now you'll apply an adjustment to this path selection. If the Layers panel is not visible, choose Win-
dow > Layers.
11
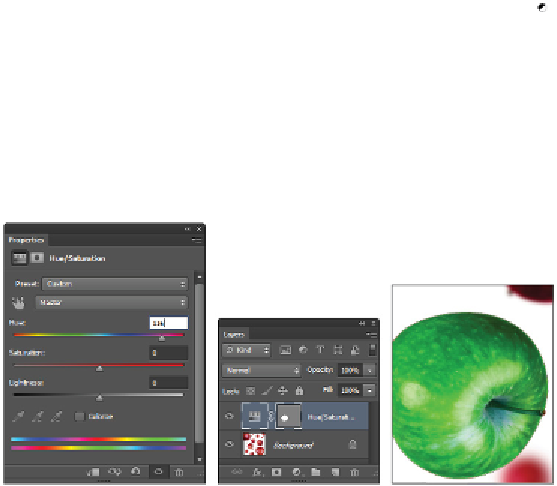
Click and hold the Create new fill or adjustment layer button ( ) at the bottom of the Layers panel and
select Hue/Saturation. The Properties panel becomes active and the Hue/Saturation adjustment is dis-
played.
12
Drag the Hue slider to +116 or type
+116
into the Hue text field. You should see only the apple turn
green.
13
A new adjustment layer is created, named Hue/Saturation 1. The pen path you created is visible to the
right of the Hue/Saturation adjustment layer thumbnail and acts as a mask, blocking the adjustment
from occurring outside of the path.
The Hue/Saturation adjustment layer.
Adjustment layer with a vector mask.
The result.
If you want to have multiple paths in the Paths panel, deselect any active path before you begin
drawing a new path. If you don't deselect, the new path you create will be added to, and become
part of, the currently active path.
14
Choose File > Save, then choose File > Close to close the file.
More Pen tool selection techniques
In the last exercise, you created a curved path. Now you'll create a path with a combination of straight
lines and curves.
1
Choose File > Browse in Bridge to bring Adobe Bridge forward. Then navigate to the ps04lessons
folder and open image
ps0409.psd
.
Choose File > Save As. When the Save As dialog box appears, navigate to the ps04lessons folder. In
the File name text field, type
ps0409_work
. Choose Photoshop PSD from the Format drop-down menu
and click Save. If the Photoshop Format Options dialog box appears, click OK.
2
Choose View > Fit on Screen, or use the keyboard shortcut Ctrl+0 (zero) (Windows) or Command+0
(zero) (Mac OS).