Graphics Programs Reference
In-Depth Information
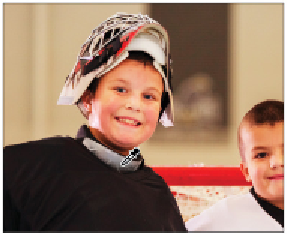
With this eyedropper, you can locate an item in the image that is considered neutral, a gray or shade of
gray, and use it to balance the color of your image. In this example, we will use the collar of the taller
boy's shirt.
5
Click once on the grey collar. You see an immediate change in the balance of the image. This is because
any color cast in the image has been neutralized. Read more about balancing color in your image in
Lesson 6, “Color Correcting an Image.”
Select the Sample grey point eyedropper from the Properties panel and click the gray in the collar.
6
If you don't already see the Layers panel, choose Windows > Layers now. When you created an adjust-
ment layer, it was added on top of the layer that contains your image information. Click the bottom
(Layer 0) layer to make it active.
Make sure to select the bottom layer, Layer 0, before moving on.
7
Choose File > Save to save the file.
Using the improved Smart Sharpen feature
In this next part of the lesson you will sharpen your image. By correctly applying sharpening to your im-
age, you can make your image look more crisp and clean, whether its final destination is as a printed im-
age or on-screen. Sharpening enhances the definition of edges in an image. The degree of sharpening that
you need to apply to your own images varies depending on the quality of the original image. Keep in mind
that sharpening cannot correct a severely blurred image.
1
Choose Filter > Sharpen > Smart Sharpen. The Smart Sharpen feature offers you the ability to sharpen
edges of objects in your image without creating unnecessary graininess (noise). In this window, you see
many controls but you will only change the value in the Amount slider.
The amount of sharpening that you choose depends upon the subject matter and how defined you want
the edges to be. Typically, you can start at about 150% and then move upwards from there, depending
upon the content of your image.