Graphics Programs Reference
In-Depth Information
In this next part of the lesson, you will use a simplified step in the curves panel. You will adjust the con-
trast of the image using a Preset. As you gain more skills in Photoshop, you will use presets less and make
more custom changes.
1
With your cropped image still open, choose Layers > New Adjustment Layers > Curves. The New Lay-
er dialog box appears; leave all the options set at the default and click OK. The Properties panel ap-
pears with a curve inside it. This may look confusing at first, but in this lesson, you will only be using
this panel to balance the color in your image and lighten it slightly. It cannot be stressed enough that
this tool is extremely powerful and covered in more detail throughout the lessons in this topic.
2
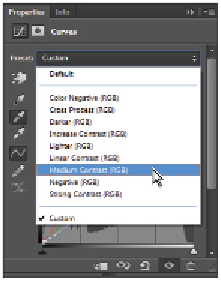
In the Properties panel, select the Preset drop-down menu and note the available presets that you have to
choose from. For this example, you will choose a preset that should improve any image, but typically
you should be careful when using presets as they typically don't give the same professional result that
can be achieved with custom changes.
3
Select Medium Contrast (RGB) from the Preset drop-down menu. You see that the contrast has been
strengthened in this image.
Increase the contrast in the image using a preset.
Adjusting the neutral
4
Click the middle Sample in image to set the gray point eyedropper that appears on the left side of the
Properties panel.
Select the Sample grey point eyedropper from the Properties panel.