Graphics Programs Reference
In-Depth Information
Previous versions of Photoshop included the Camera Raw component; now, Photoshop has added the
Camera Raw filter in Photoshop CC. This filter allows you to access many of the helpful correction tools
that were previously available only in the Camera Plug-in. Using the Camera Raw filter, you have many of
the same options as the plug-in, though some have been removed because they don't apply to the filter
workflow. The features that are removed from the Camera Raw Filter dialog box are Rotate, Crop, Save,
Lens, and Camera profile to name a few. In this part of the lesson, you'll try out the filter to make two
simple corrections. For more details about working in the Camera Raw, see Lesson 6, “Color Correcting
an Image.”
1
With
ps1401_work.psd
still open, select the Camera layer and then choose Filter > Convert for Smart
Filters. This turns this layer into a Smart Object, thus allowing you to edit it again for a future use. For
more details about Smart Objects, see Lesson 12, “Using Smart Objects in Photoshop.”
If a dialog box appears informing you that to enable re-editable smart filters the selected object with be
converted to a Smart Object, click OK.
The Camera layer is a low-quality image that you will use to try out some of the new tools in Pho-
toshop CC.
2
Choose Filter > Camera Raw Filter. The Camera Raw dialog box appears. In this dialog box, you will
adjust two items: the white point to balance the color, and the exposure to lighten the image a bit.
3
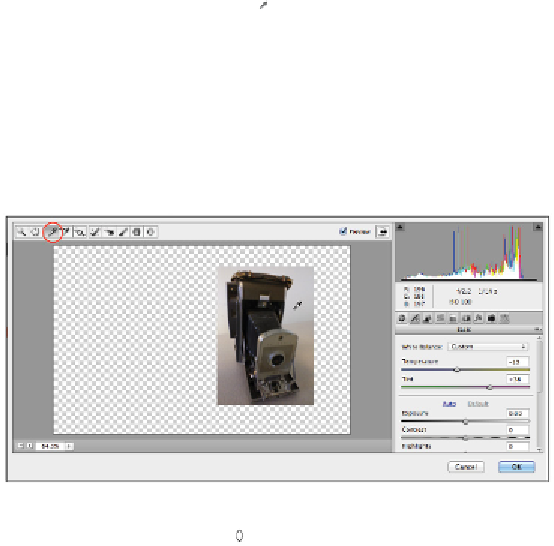
Select the White Balance tool ( ) from the toolbar at the top of the Camera Raw dialog box. The White
balance tool can be used to click an area in the image that is a shade of grey. By locating a grey or a
neutral shade and clicking it with the White Balance tool, you can eliminate casts in the image relat-
ively easy. Keep in mind that this is a quick correction technique; if you need more control, use the
Curves panel.
4
With the White Balance tool selected, click the wall behind the camera. The yellowish-orange cast
caused by the incandescent lighting is removed. You will now increase the exposure using the Radial
filter.
Select the White balance tool and click the wall to remove the color cast.
5
Select the Radial filter tool ( ), press and hold Control+Shift (Windows) or Command+Shift (Mac OS),
and then drag from the center of the lens of the camera until the edge of the radius reaches the right side
of the image. By holding the Control/Command and Shift key, you can make a perfect circular radial
filter selection from a center point. The Radial Filter acts as a vignette (or feathered) selection tech-
nique in the Camera Raw filter.

