Graphics Programs Reference
In-Depth Information
5
Click the Save button to save your file as a GIF animation. Navigate to the ps13lesson folder and type
animation_done.gif
in the File name text field.
6
In the Format drop-down menu, choose Images Only and click Save.
7
Choose File > Save to save your file, then choose File > Close to close your Photoshop document.
8
To test your file, open any browser application and choose File > Open File, browse to locate your GIF,
and then open it directly into your browser window.
Creating animation for HD video
For this part of the lesson, you will create a type of on-screen graphic called a lower third. Usually seen on
television and in documentary-style films, a lower third is the text and graphics that usually appear on
screen to introduce a speaker. The name comes from the fact that the text and graphic take up the lower
third of the frame. To create the lower third, you'll bring a graphic into a blank document and animate its
opacity parameter so it fades in. Then you'll render the video file so it can be imported into a high-defini-
tion video project.
Working in Timeline mode
The Timeline mode of the Animation panel functions differently from the Frame mode. In the Timeline
mode, each layer has parameters for position, opacity, and effects that can have key frames assigned to
them individually.
1
Choose File > New and choose Film & Video from the Preset drop-down menu. Click the size menu
and choose the HDTV 1080p/29.97 option. This setting refers to the pixel resolution of most high-
definition projects (1920 × 1080). Choose Transparent from the Background Contents drop-down
menu. Click OK.
A warning dialog box might appear telling you that the pixel aspect ratio is for previewing purposes
only. Click OK.
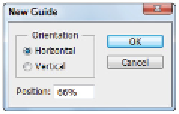
2
Choose View > New Guide. While the presets include guidelines to define the Action and Title safe
areas of the video frame, there is nothing to indicate where your lower third should end.
3
In the New Guide dialog box, select the Horizontal radio button, type
66%
in the Position text field, and
click OK. This creates a new guideline 66% from the top of your document and marks the lower third
of the video frame.
Create a guide indicating the lower third.
4
Choose File > Open and open
ps1305.psd
from the ps13lessons folder.
5
Select the Move tool ( ) and then click and drag the image (ps1305.psd) to the tab for your untitled doc-
ument. Keep holding the mouse until the empty page toggles into view; make sure your cursor is over
the image, and then release the mouse to add the lower third layer to this document. If an Aspect Ratio
warning dialog box appears, click OK.