Graphics Programs Reference
In-Depth Information
Once you add a Smart Filter, you can go back and modify the effect, even if you've added a mask, as in
this case.
1
In the Butterfly 4 layer, double-click the Motion Blur effect; the Motion Blur dialog box appears. You
might have to click and drag down and to the left inside the filter preview window to see the image.
Change the angle to 87 degrees by clicking and dragging the dial to the right. Click OK when done.
Changing the angle of the motion blur now requires you to go back with the paintbrush and modify the
mask.
2
Click the layer mask thumbnail to the left of Smart Filters to activate it. Then begin to paint from the
top down, leaving just a blur at the bottom of the butterfly. If you mask out too much of the effect, you
can press
X
to switch to white as the foreground color to restore the effect in the desired areas.
3
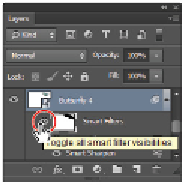
Click the Visibility icon ( ) next to the Smart Filter mask. This turns the mask off completely, and can
help identify areas affected by a filter that you might have missed. Click the Visibility icon again to turn
the mask back on and clean up any areas where you don't want the filter applied.
Turn off the effects of the mask by selecting
the Visibility icon.
4
In the Layers panel, click the Visibility icon to the left of the Visit the Rainforests type layer on the top.
(You turned this layer off at the beginning of the exercise). Click the padlock icon in the Lock section
of the Layers panel. Select the Move tool, and then click and drag to reposition the layers as needed.
5
Choose File > Save.
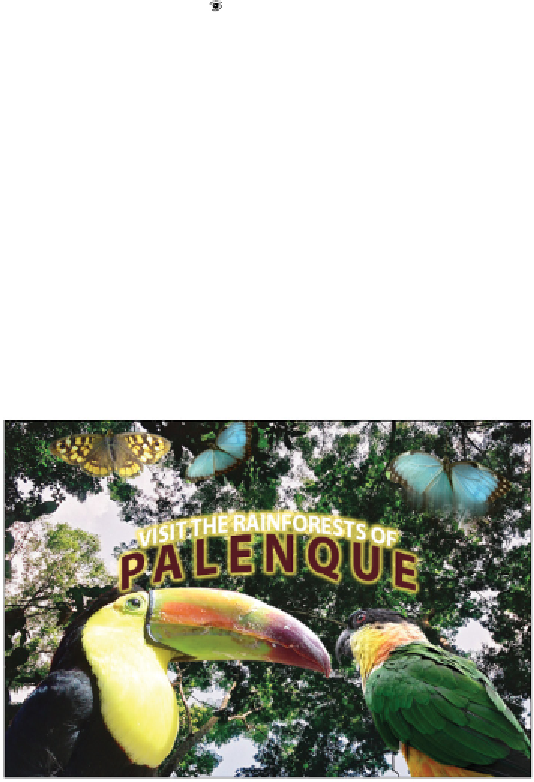
The completed lesson file.