Graphics Programs Reference
In-Depth Information
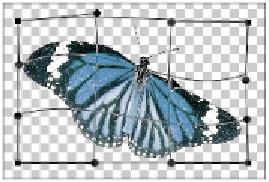
Clicking and dragging the warp handles to warp the image.
5
Press Enter (Windows) or Return (Mac OS) when you are satisfied with the effect.
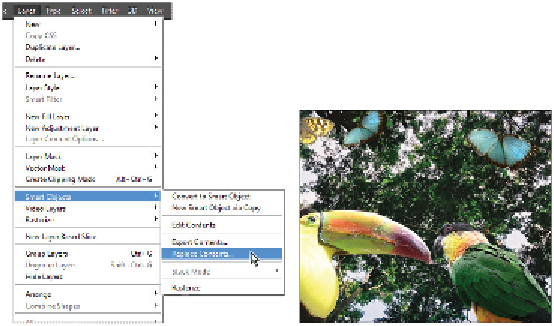
Now you will replace the two butterflies with a new image, while maintaining the transformations you
created.
6
With the Butterfly 4 layer still selected, choose Layer > Smart Objects > Replace Contents. Locate the
ps12lessons folder, select
ps1206.psd
, and click Place. Both images update automatically while retain-
ing their individual transformations.
Chose to replace your smart object.
The result.
This technique can be extremely helpful, because it saves you from having to repeat similar steps.
Working with Smart Filters
Now that you have a good foundation for Smart Objects, the concept of Smart Filters shouldn't be too hard
to follow. A Smart Filter is simply one of the Photoshop filters applied to a Smart Object layer. Filters are
usually destructive—that is, any effect applied to a layer becomes more difficult to remove. When you use
a Smart Filter, any filter you apply is not permanent. Effects can be toggled off and on, combined, or de-
leted. As you will see in this exercise, you can work with the built-in mask of a filter effect to customize
your filter effects in ways that were previously not possible in Photoshop.
In this exercise, you will be applying a combination of two filters to create an effect of motion, then you
will use the layer mask to refine the effect with the Brush tool.