Graphics Programs Reference
In-Depth Information
You will now open the same image as a Smart Object so you can see the benefit of non-destructive edit-
ing.
5
Click the Visibility icon ( ) next to the Butterfly layer to turn the layer's visibility off. You will turn it
back on shortly so you can compare the two layers.
6
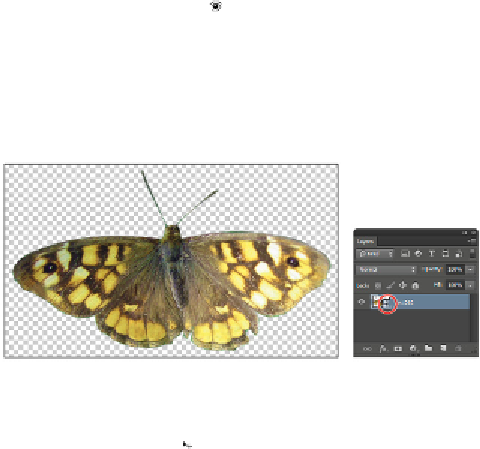
Choose File > Open As a Smart Object. Navigate to the ps12lessons folder and choose the
ps1202.psd
file. Click Open to open the image in a new document window. In the Layers panel, note that the
thumbnail for the layer is now a Smart Object thumbnail. All Smart Objects have a Smart Object icon
in the lower-right corner of the layer thumbnail to help you distinguish them from standard layers.
The image is opened as a Smart Object.
Smart Object icon.
7
Select the Move tool ( ). Click and drag the butterfly image onto the tab labeled
ps1201_work.psd
.
Wait for a moment until this image toggles into view, and then drop the butterfly image onto the image.
Using the Move tool, reposition the new layer at the bottom of the screen. The bottom of the butterfly
wings should be touching the bottom of the image.
8
In the Layers panel, double-click directly on the layer name, ps1202. When the layer name becomes
highlighted, type
Butterfly 2
and press Enter (Windows) or Return (Mac OS) to commit the change.
9
Click the tab for the
ps1202.psd
image to make it active, and choose File > Close. When prompted to
save, choose to not save the file.
You'll now perform the same scaling on the new Smart Object that you performed earlier on the first
butterfly.
10
In the
ps1201_work
file, choose Edit > Free Transform or use the keyboard shortcut Ctrl+T (Win-
dows) or Command+T (Mac OS).
11
Press the Shift key, click and hold the top-right corner of the transform box, and drag toward the cen-
ter of the box. Scale the butterfly down in size until the horizontal value is approximately 25 percent.
Press Enter (Windows) or Return (Mac OS) to commit the transformation.
12
Use the keyboard shortcut Ctrl+T (Windows) or Command+T (Mac OS). Press the Shift key, and then
click and drag the top-right corner of the transform box away from the center to scale the image up to
100 percent. Press Enter (Windows) or Return (Mac OS) to commit the change.
When scaling Smart Objects, they “remember” their original size in the scale text boxes for Width
and Height in the Options bar. This makes it easy for you to control the sizing and not dramatically
stretch the image beyond its original size.