Graphics Programs Reference
In-Depth Information
You can collapse a panel by clicking the double-arrows.
Customizing your panels
A panel group is made up of two or more panels that are stacked on top of each other. To view the other
panels in a group, select the name on the tab of the panel. You will now learn to organize your panels ac-
cording to your preferences.
1
If the Swatches panel is not forward, select the tab that reads Swatches; the Swatches tab is brought for-
ward.
2
Now, select the Color tab to bring the Color panel to the front of the panel group.
3
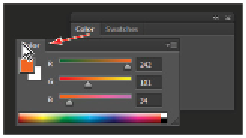
Click the tab of the Color panel, drag it away from the panel group and into the image area, and then re-
lease the mouse—you have just removed a panel from a panel group and the docking area. Rearranging
panels can help you keep frequently-used panels together in one area.
The Color panel as it is dragged away from a panel group.
4
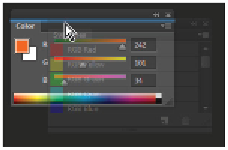
Click the tab area at the top of the Swatches panel and drag it over the Color panel. As soon as you see
an outline around the Color panel, release the mouse. You have now made a panel group.
The Swatches panel dragged into the Color panel, creating a new panel group.
You'll now save a custom workspace. Saving a workspace is a good idea if you have production pro-
cesses that often use the same panels. Saving workspaces is also helpful if you are in a situation where
multiple users are sharing Photoshop on one computer.
5
Select Window > Workspace > New Workspace; the New Workspace dialog box appears.
6
In the File name text field, type
First Workspace
, and then click Save.