Graphics Programs Reference
In-Depth Information
If you inadvertently close any images while working on a project, you can quickly reopen them by
choosing File > Open Recent, and selecting the file from the drop-down menu.
Painting on the adjustment layer mask
If you take a look at the Layers panel you just created, you see a Hue/Saturation adjustment layer that has
a mask thumbnail to the right of the layer thumbnail. You can activate this mask separately, and then use
painting tools to refine it.
1
Alt+click (Windows) or Option+click (Mac OS) the adjustment mask thumbnail to the right of the Hue/
Saturation thumbnail in the Layers panel.
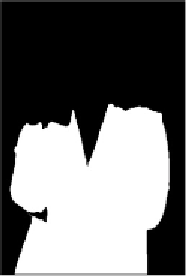
The mask appears. You are not doing anything to the mask at this time, but you should take a look at
what the actual mask looks like. Notice that where there is white, the hue and saturation changes take
place. Where the mask is black, the changes are not occurring. Using the painting tools in Photoshop,
you can edit a mask by painting black and white and even varying opacities to control the results of the
adjustment layer.
Where the mask is white, the Hue/Saturation change is occurring.
2
To return to the normal layer view, click once on the word
Background
in the Layers panel.
You will now make changes to the adjustment mask thumbnail.
3
Click once on the adjustment mask thumbnail (to the right of the Hue/Saturation adjustment layer
thumbnail).
Paint on the adjustment layer's mask to refine your selection.
4
Now, select the Brush tool ( ), and press
D
on your keyboard to set the colors to the default of black and
white. Note that when in a mask, white is the foreground color and black is the background color.