Graphics Programs Reference
In-Depth Information
work with 100-layer images. To help you stay organized, and therefore more productive, be sure to name
your layers appropriately.
1
Double-click the layer name, Layer 1. The text becomes highlighted and the insertion cursor appears.
You can now type
red square
, and then press the Enter (Windows) or the Return (Mac OS) key, to
provide this layer with a descriptive name.
2
You can also name a layer before you create it. Press and hold the Alt (Windows) or Option (Mac OS)
key and click the Create a New Layer button ( ) at the bottom of the Layers panel. The New Layer dia-
log box appears.
As a default, new layers appear on top of the active layer. Use Ctrl+Alt (Windows) or Com-
mand+Option (Mac OS) to open the New Layer dialog box and add the new layer underneath the
active layer.
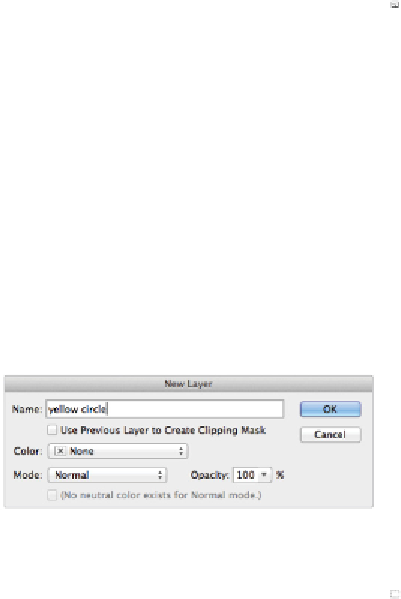
3
In the File name text field, type
yellow circle
, since you are about to create a yellow circle on this layer.
4
For organizational purposes, you can change the color of the layer in the Layers panel, which can help
you locate important layers more quickly. For the sake of being color-coordinated, choose Yellow from
the Color drop-down menu and click OK. A new layer named yellow circle is created. The Layer Visib-
ility icon in the Layers panel has a yellow background. This background does not affect the actual con-
tents of your layer.
Press and hold the Alt/Option key when creating a new layer so that you can name it right away.
Now you will put the yellow circle on this layer.
5
Click and hold the Rectangular Marquee tool ( ), then choose the hidden Elliptical Marquee tool ( ).
You can also cycle through the marquee selection tools by pressing Shift+M.
6
Click and drag while holding the Shift key down to create a circle selection in your image area.