Graphics Programs Reference
In-Depth Information
how to apply masks and use other incredible Smart Object features in Lesson 12, “Using Smart Ob-
jects in Photoshop”.
Comparing your image with the original
You can use the History panel in Adobe Photoshop for many functions. In this section, you'll use the His-
tory panel to compare the original image with your finished file.
1
If the History panel is not visible, choose Window > History.
2
Make sure that you have the final step you performed selected. In this case, it should be the Unsharp
Mask filter. If you have some extra steps because you were experimenting with the Smart Filter thumb-
nail, just click the Unsharp Mask state in the History panel.
3
Click the Create New Document from Current State button ( ) at the bottom of the History panel. A
new file is created.
4
Click back on your original image,
ps0601_work.psd
, and press Ctrl+0 (zero) (Windows) or Com-
mand+0 (zero) (Mac OS) to fit the image on your screen.
5
Click the original snapshot located at the top of the History panel. This returns you to the original state.
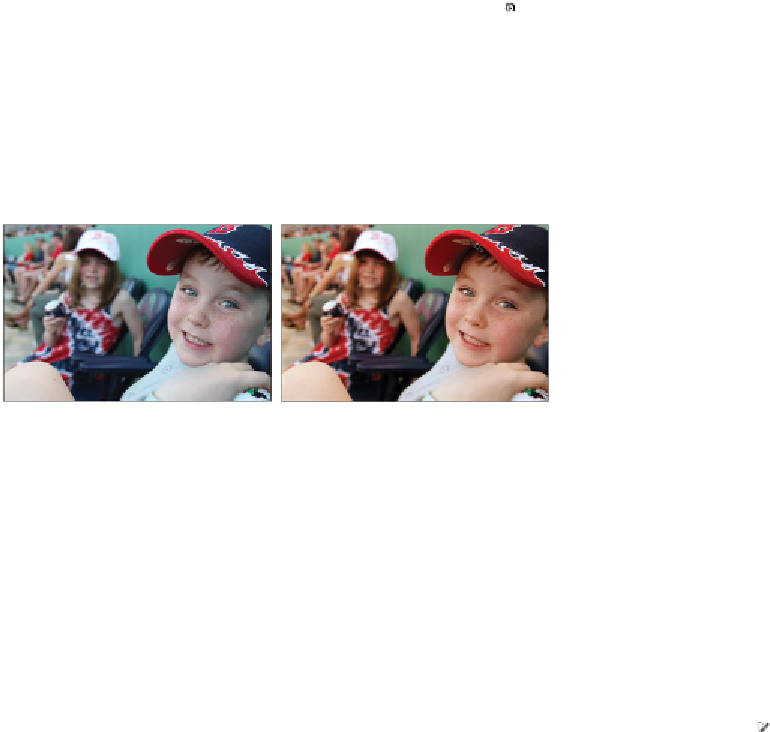
6
Select Window > Arrange > 2-up Vertical to place the images side by side. Zoom into the area surround-
ing the small child to see that it appears almost as if a cast of color has been lifted from the image, pro-
ducing a cleaner, brighter image.
Comparing your corrected image with the original image.
7
Choose File > Save, and then File > Close to close your
ps0601_work
file.
8
Choose File > Close for the unsharp mask file created from your History panel. When asked to save the
changes, click No, or Don't Save.
Taking care of red eye
Red eye typically occurs when you use a camera with a built-in flash. The light of the flash occurs too fast
for the iris of the eye to close the pupil, revealing the blood-rich area alongside the iris. There are many
cameras that come with features to help you avoid this phenomenon, and most professional photographers
don't experience this, since they typically use a flash that is not directly positioned in front of the subject.
Also, there is a solution that is built right into Photoshop.
1
Open the image named
ps0602.psd
, click and click and hold the Spot Healing Brush tool ( ) and drag
down to select the Red Eye tool ( ).
Choose File > Save As. The Save As dialog box appears. Navigate to the ps06lessons folder on your
hard drive. Name the file
ps0602_work
, choose Photoshop from the Format drop-down menu, and
click Save.