Graphics Programs Reference
In-Depth Information
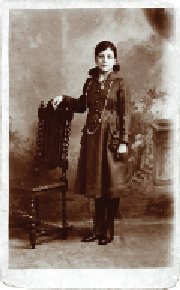
The image after using the retouching tools.
2
You can choose File > Close after viewing this file, or leave it open for reference.
Using the Clone Stamp tool
One of the problems with old photographs is that they most likely contain a large number of defects. These
defects can include watermarks, tears, and fold marks. There are many different ways to fix these defects;
one of the most useful is the Clone Stamp tool. The Clone Stamp tool lets you replace pixels in one area of
the image by sampling from another area. In this part of the lesson, you'll use the Clone Stamp tool, and
you will also have an opportunity to explore the Clone Source panel.
1
Choose File > Browse in Bridge, and then navigate to the ps05lessons folder and open image
ps0505.psd
.
2
Choose File > Save As; the Save As dialog box appears. Navigate to the ps05lessons folder and type
ps0505_work
into the File name text field. Choose Photoshop from the Format drop-down menu and
click Save.
You'll first experiment with the Clone Stamp tool ( ). Don't worry about what you do to the image at
this stage, since you will revert to saved when done.
3
Select the Zoom tool and click and drag a marquee around the top half of the image to zoom in closer to
the face.
4
Select the Clone Stamp tool.
5
Position your cursor over the nose of the girl in the image and press and hold the Alt (Windows) or Op-
tion (Mac OS) key. Your cursor turns into a precision crosshair. When you see this crosshair, click with
your mouse. You have just defined the source image area for the Clone Stamp tool.
6
Now position the cursor to the right of the girl's face, then click and drag to start painting with the
Clone Stamp tool. The source area that you defined is recreated where you are painting. Watch care-
fully, since you will see a coinciding crosshair indicating the area of the source that you are copying.