Graphics Reference
In-Depth Information
2.
Now click on the New button to create a new material. In the Material window under
the Properties panel, switch the Diffuse BSDF with an Emission shader node.
3.
In the Node Editor window, add an Image Texture node (press
Shift
+
A
and navigate
to Texture | Image Texture) and connect its Color output to the Color input socket of
the Emission shader.
4.
Click on the Open button on the Image Texture node to load the
teddybear.png
image texture.
At this point, we are at the same stage as step 2 of the first method. We have created
a light emission material based on the image texture mapped on the Suzanne mesh.
5.
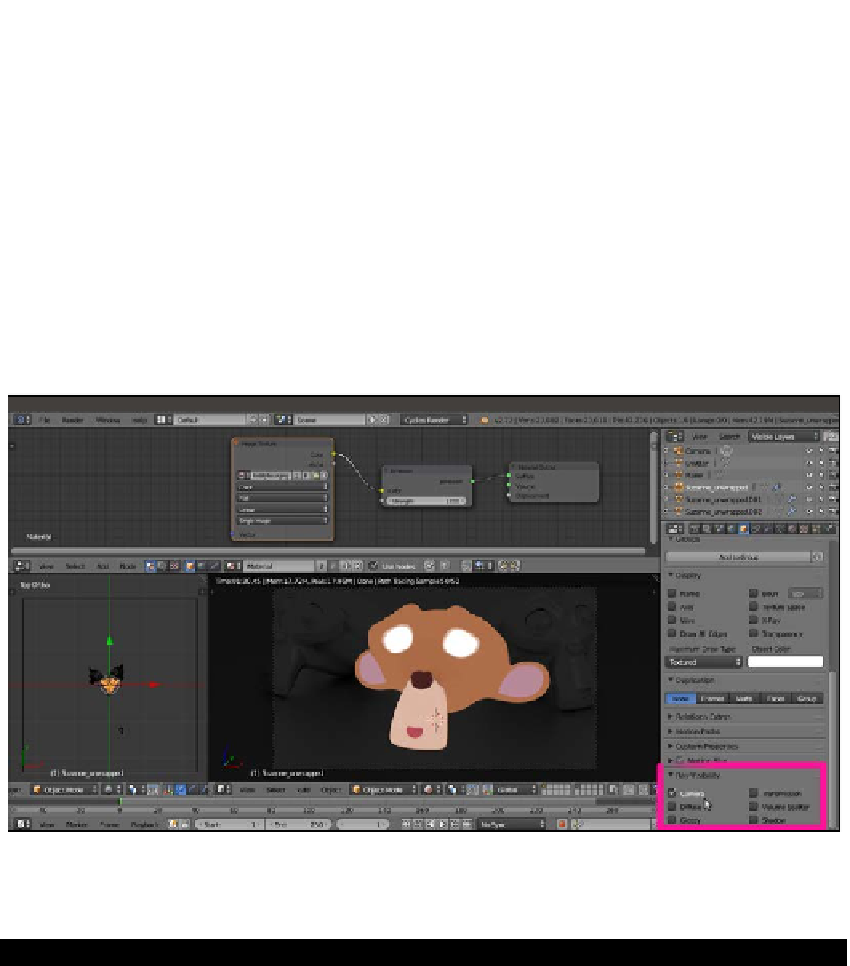
Now go to the Object window under the main Properties panel to the right of the
screen. In the Ray Visibility subpanel (usually the last at the bottom) uncheck the
Diffuse, Glossy, Transmission, Volume Scatter and Shadow items.
The shadeless Suzanne obtained through the Ray Visibility subpanel
So basically, only the Camera item is active now. Simple, quick, and effective!
Creating a fake immersion effect material
In this recipe, we will create a material to give the effect of an object immersed in a substance
becoming more and more opaque as the depth increases, for example, murky water.