Graphics Reference
In-Depth Information
10. Add a Frame (press
Shift
+
A
and navigate to Layout | Frame). Press
Shift
to select
these nodes and then the Frame. Then press
Ctrl
+
P
to parent them. Rename the
frame as
RED_TERMINATOR
.
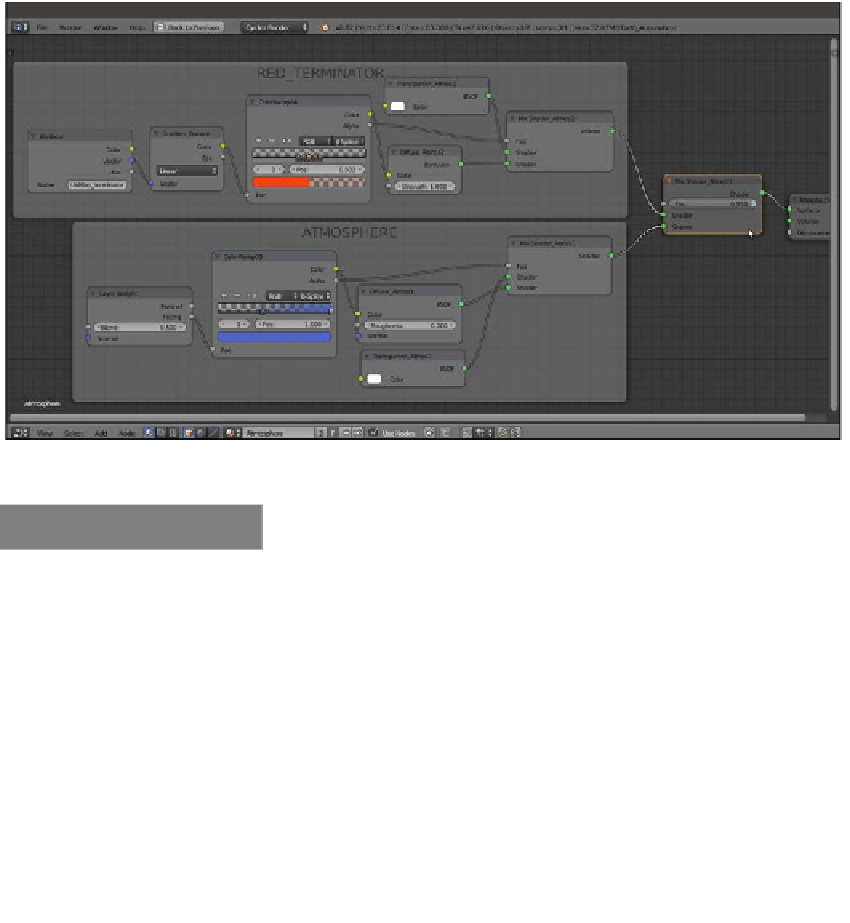
11. Add a final Mix Shader node (press
Shift
+
A
and navigate to Shader | Mix Shader),
label it as
Mix Shader_Atmos3
, and set the Fac value to
0.950
. Connect the
output of the RED_TERMINATOR frame to the first Shader input socket and the
output of the ATMOSPHERE frame to the second Shader input socket. Then connect
the output of the Mix Shader_Atmos3 node to the Surface input socket of the
Material Output node as shown in the following screenshot:
The RED_TERMINATOR and the ATMOSPHERE frames
How it works...
The three overlapping UV Spheres technique is quite old, and (at least for what relates to
Blender) dates back to almost 2004—more precisely to the
How to make a realistic planet
in Blender(2004)
tutorial I wrote at that time for Blender version 2.23/2.30 (
http://www.
enricovalenza.com/rlpl.html
)
. That tutorial is now outdated, but the technique and
basic concepts still work, even in Cycles. Hence, we get the planet surface on the smaller
of the spheres, a clouds layer on a slightly bigger sphere, and the enveloping atmospheric
Fresnel effect on the biggest sphere.