Graphics Reference
In-Depth Information
10. Add a Camera Data node (press
Shift
+
A
and navigate to Input | Camera Data),
a Math node (press
Shift
+
A
and navigate to Converter | Math), an Emission node
(press
Shift
+
A
and navigate to Shader | Emission), and a Mix Shader node (press
Shift
+
A
and navigate to Shader | Mix Shader). Label the Mix Shader node as
Mix
Shader_Fog
.
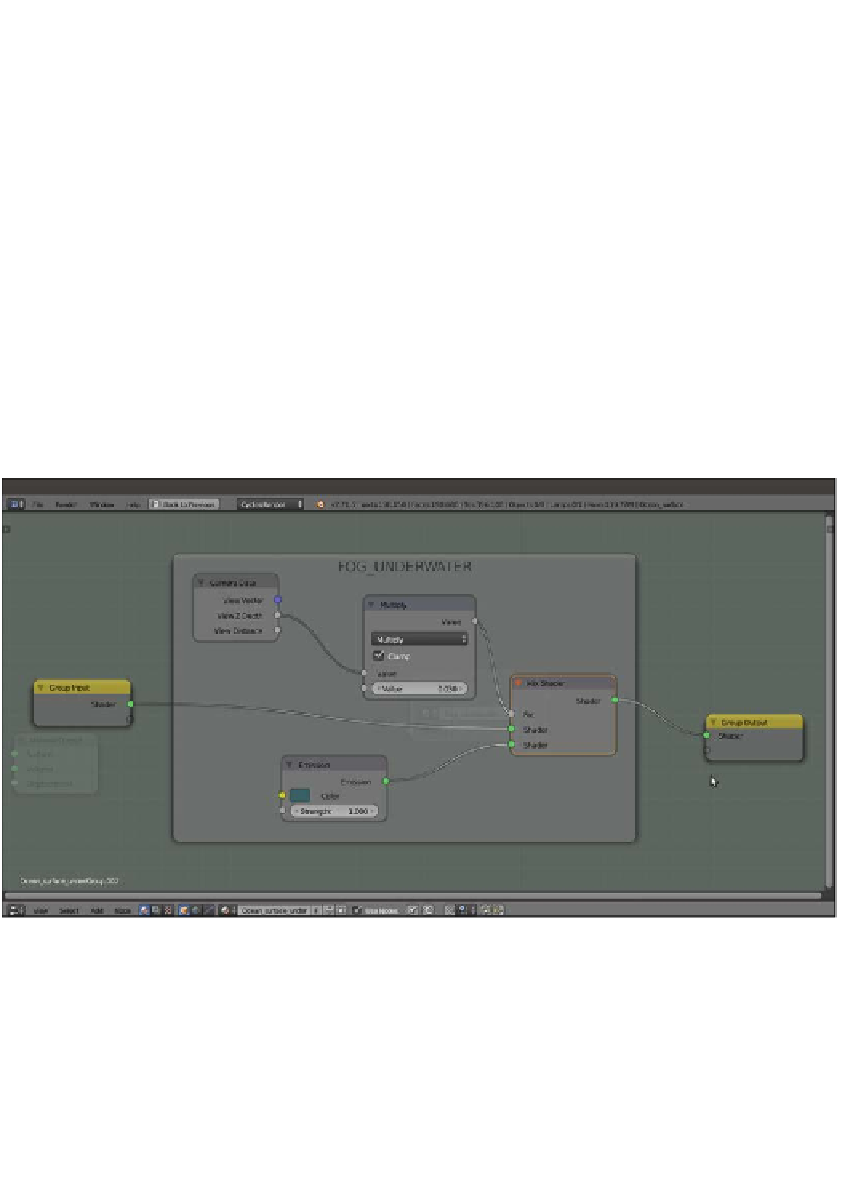
11. Connect the View Z Depth output of the Camera Data node to the first Value
input of the Math node. Set the Math node's Operation to Multiply and the second
Value to
0.030
. Check the Clamp option. Connect the Multiply node output to the
Fac input socket of the Mix Shader_Fog node.
12. Connect the Emission output to the second Shader input of the Mix Shader_
Fog node. Set the Color values for R to
0.040
, G to
0.117
, and B to
0.124
.
13. Select all the new nodes and press
Ctrl
+
G
to make a group. Click and drag the first
Shader input socket of the Mix Shader_Fog node into the empty socket of the Group
Input node on the left and repeat this step by connecting the Shader output socket
on the right. Press
Tab
to close the group. Then rename it as
Fog_underwater
as
shown in the following screenshot:
The FOG_UNDERWATER node group in Edit Mode
14. Add and paste the Fog_underwater node (press
Shift
+
A
and navigate to Group
| Fog_underwater) just before the Material Output node of every material (in our
scene, the Fog_underwater node will show eight users if the
fake user
button is
selected) as shown in the following screenshot:


