Graphics Reference
In-Depth Information
2.
Click on New in the Material window under the Properties panel or in the Node
Editor toolbar. Rename the material
Rusty_metal
.
3.
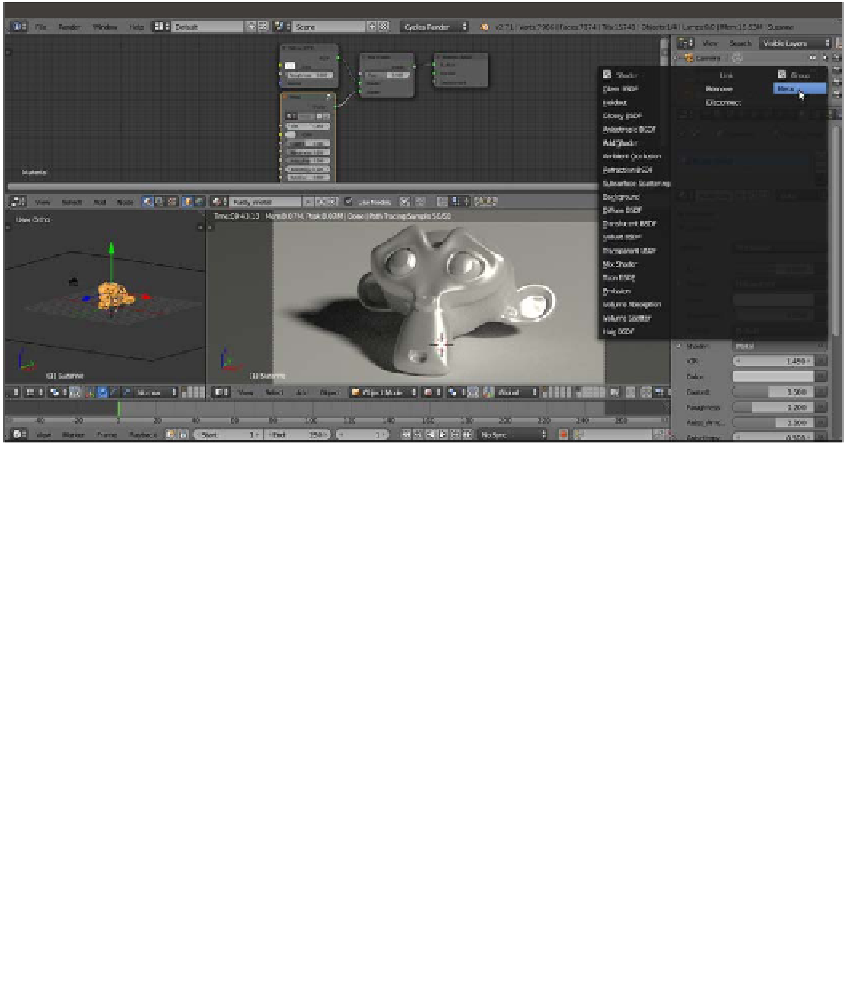
In the Material window, switch the Diffuse BSDF shader with a Mix Shader node,
and in the first Shader slot, select a Diffuse BSDF shader. In the second Shader
slot, under Group in the pop-up menu, load the linked Metal node group, as shown
in the following screenshot:
The Properties pop-up menu used to select different nodes
4.
Add Frame (press
Shift
+
A
and navigate to Layout | Frame). Select the Diffuse BSDF
shader, the Metal node group, the Mix Shader node, and then the Frame.
Press
Ctrl
+
P
to parent them. In the Properties panel of the Node Editor window
(press the
N
key to make it appear), label the Frame as
SHADERS
.
5.
In the Metal group, set the IOR value to
1.370
. Change the Color values for
R to
0.229
, G to
0.307
, and B to
0.299
. Set the Roughness value to
0.200
,
Aniso_Amount to
0.200
, and Anisotropy to
0.600
.
6.
Add a Texture Coordinate node (press
Shift
+
A
and navigate to Input | Texture
Coordinate) and two Mapping nodes (press
Shift
+
A
and navigate to Vector |
Mapping). Connect the Object output of the Texture Coordinate node to the Vector
input of both the Mapping nodes. Label them as
Mapping1
and
Mapping2
.