Graphics Programs Reference
In-Depth Information
5.
The new channel should automatically be selected; click its
visibility icon (the small empty box next to its name). Turn
off the visibility of the blue channel (click the eye icon next
to its name).
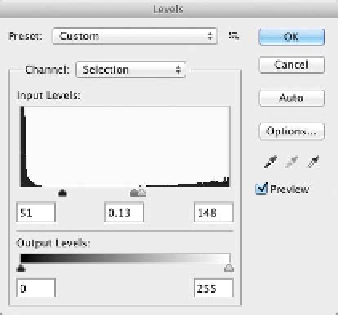
6.
Press Command+L (Ctrl+L) to invoke a Levels adjustment.
This will allow you to adjust contrast on the mask. Make sure
the Preview check box is selected.
7.
Move the Black Input Levels slider to the right to increase
contrast in the black areas.
8.
Move the White Input Levels slider to the left to increase con-
trast in the white areas.
9.
Move the middle (gray) input slider to the right to touch up the
spotty areas.
10.
Click OK to apply the adjustment to the channel.
11.
To sof t en t he edges of t he cha n nel , choose F i lt er > Blur >
Gaussian Blur. Apply the filter with a value of 2 or 3 pixels
to soften the edge.
12.
To loa d t he select ion , C om ma nd- cl ick ( C t rl- cl ick) t he S elect ion
channel to create an active selection. By selecting the logo, you
can make a controlled adjustment.
You now h ave a g r e a t s ele c t ion t h a t 's r e a dy t o u s e for i m a g e
adjustments or layer masking. Both topics will be covered in
depth in the coming chapters.