Graphics Programs Reference
In-Depth Information
1.
Open the Ch15_Crop_and_Straighten.tif file from the Chap-
ter 15 folder. If you would rather, just scan in a few images on
your own scanner.
2.
Choose File > Automate > Crop And Straighten Photos.
NoTe
Hidden Menu Items
It's possible to customize menus
and actually hide commands. If you
don't see a particular command, be
sure to choose the Show All Menu
Items command at the bottom of
each menu or submenu.
Each image should be cropped, straightened, and moved into
its own document window.
Tip
Crop and Straighten Best Results
For best results, you need to keep 1/8 inch between the images in your
scan. If the Crop And Straighten Photos command does not succeed (which
is rare), you should process the individual images using the Crop tool. If
images are dramatically different exposures, scan them separately.
Conditional Mode Change
The Conditional Mode Change command is
meant to be used within an action. It allows you
to specify conditions for a mode change to occur
during an action. Recording a mode change into
an action can result in an error if the action is run
on an image that has a different image mode. For
example, if one step of an action were to convert
an image from a source mode of RGB to a target
mode of CMYK, applying this action to an image
in Grayscale mode would result in an error. The
command allows you to specify one or more source modes and a
mode for the target mode.
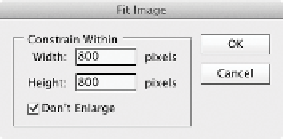
Fit Image
The Fit Image command is also meant to be inserted into an
action. It allows you to specify a maximum width and height (in
pixels) that the image cannot exceed. This is useful when sizing
images for the screen or Internet. If you intend to use it for print
resolution, you'll need to know your resolution setting and mul-
tiply by your desired print size to convert inches to a pixel-based
measurement.