Graphics Programs Reference
In-Depth Information
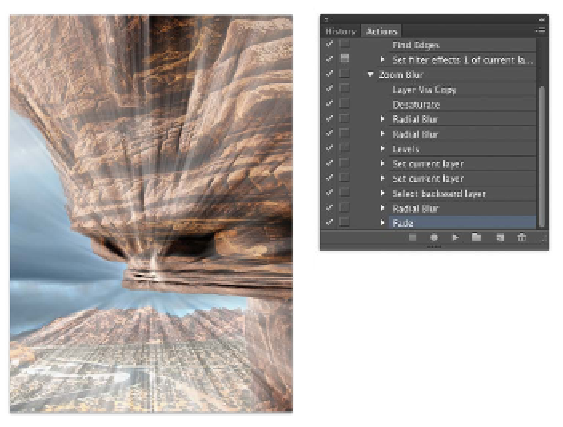
12.
To a ch ieve t he look you need t To
fade the filter, choose Edit > Fade
Radial Blur. Lower the Opacity of
the effect to 30%, and click OK.
13.
In the Actions panel, click Stop.
Experiment and create your own looks. Virtually every menu
command or button can be recorded. Starting with Photoshop
CS6, even tools can (just be sure to set your rulers to percentages
to get relative results—see the “Tips for Creating Better Actions”
sidebar). Actions can be duplicated, modified, and deleted. Be sure
to explore all the options in the Actions panel submenu. Be sure
to dissect actions made by others to get ideas of what is possible.
With a little practice and imagination you'll be amazed at what
you can accomplish.
If you want to check out the actions you just created, compare
them to a set I've saved in the Chapter 15 folder.
Tip
Sharing Actions
If you create useful actions, you
can post them to the Adobe Studio
Exchange community to share with
other users (
www.adobe.com/
Saving Actions
Actions are stored in a temporary cache. If you delete the set,
load a replacement, or experience an application crash, your new
actions could be overwritten. Therefore, it's important to save your
actions so they can be backed up and reloaded in the future.
1.
Click an action set. You can use the one created in the previ-
ous exercise. You must click the whole set, not just an action in
that set.
2.
Go to the Actions panel submenu, and choose Save Actions.
3.
The Photoshop Actions folder (inside the Presets folder) will be
chosen by default. If it isn't, manually locate it in your Presets
folder.
4.
If you add to the set later, just be sure to resave it to the same
location with the same name.