Graphics Programs Reference
In-Depth Information
Dodge and Burn Tools
The Dodge and Burn tools are known as toning tools. They allow
you finer control over lightening or darkening your image. These
tools simulate traditional techniques used by photographers. In a
darkroom, the photographer would regulate the
amount of light on a particular area of a print.
These tools are particularly helpful when touch-
ing up faded photos, especially when repairing
water damage. Let's try out both tools.
video 85:
Dodge and Burn
1.
Close any open files, and then open the file
Ch11_Dodge_Burn.tif from the Chapter 11
folder.
2.
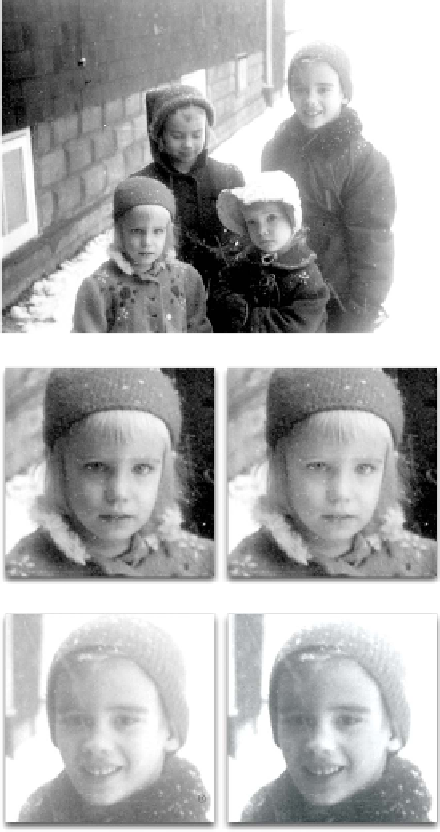
Duplicate the current layer because the
Dodge and Burn tools are destructive. Closely
examine the four faces. You should notice
that the two on the right look washed out, and
the two on the left are a bit dark.
3.
Select the Dodge tool from the Tools panel.
Adjust the brush to be soft and large (approxi-
mately 80 pixels). Set the tool to adjust the
Midtones.
4.
Paint over the shadowed faces on the left half
of the picture to bring out the darkest areas
a bit.
5.
Select the Burn tool from the Tools panel.
Adjust the brush to be soft and large (approxi-
mately 80 pixels). Set the tool to adjust the
Highlights and set an Exposure setting of 20%.
6.
Paint over the washed-out faces on the left
half of the picture to restore the contrast a bit.
7.
Continue to touch up areas in the photos as
needed. Lower exposure settings are gener-
ally more desirable.
Tip
Protect Those Tones
If you are working on color images, be sure to use the Protect Tones option
for the Dodge and Burn tools. Simply select the check box in the Options
bar to get more natural-looking results.


