Graphics Programs Reference
In-Depth Information
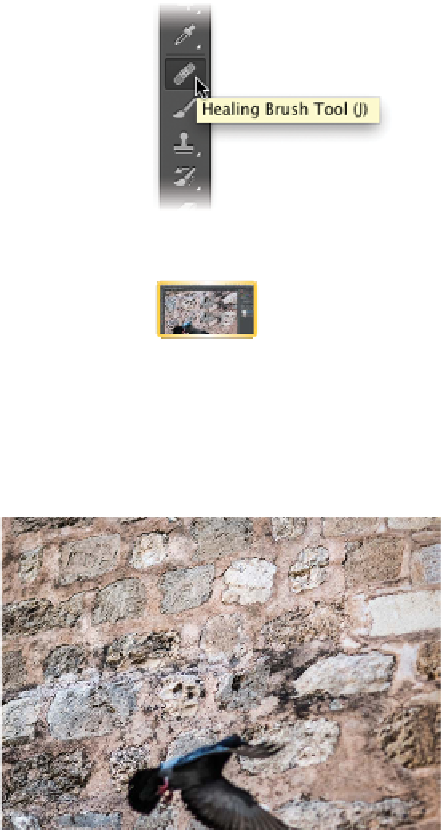
Healing Brush Tool
The Healing Brush tool ( J) is an innovative and powerful tool that
can be used to repair blemishes in a photo. The Healing Brush
tool operates much like the Clone Stamp tool. However, instead
of just moving pixels from one area to another, the Healing Brush
tool clones pixels while also matching the texture, lighting, and
shading of the original pixels.
Because the Healing Brush samples surrounding areas, you may
want to make an initial selection around the damaged area and
feather it. This will give you better results on an area with strong
contrast. The selection should be slightly bigger than the area that
needs to be healed. It should follow the boundary of high-contrast
pixels. For example, if you're healing a blemish on a subject's
face, make an initial selection of the skin area to avoid mixing in
the adjacent background or clothing. The selection will prevent
color bleed-in from outside areas when painting with the Healing
Brush tool.
video 78:
Healing Brush
1.
Close any open files, and then open the
file Ch11_Healing_Brush1.tif from the
Chapter 11 folder.
The photo is of a wall texture that will be
used as a background layer for a composite.
There is a distracting element that needs to
be removed.
2.
Activate the Healing Brush tool by
pressing J. (Be sure to closely examine
the icon and not select the Spot Healing
Brush tool.)
3.
Select a soft brush from the Options bar or
the Brush panel.
4.
Set the blending mode to Replace. This
option preserves noise and texture at the
stroke's edges.
5.
Specify a source for repairing pixels in the
Options bar. The standard option is to use
Sampled. This takes pixels from the area surrounding the
sample point. As the brush moves, the sample point also moves
to ensure variety in the sampled source.