Graphics Programs Reference
In-Depth Information
3.
Click the Zoom Levels presets list and choose Fit In View.
4.
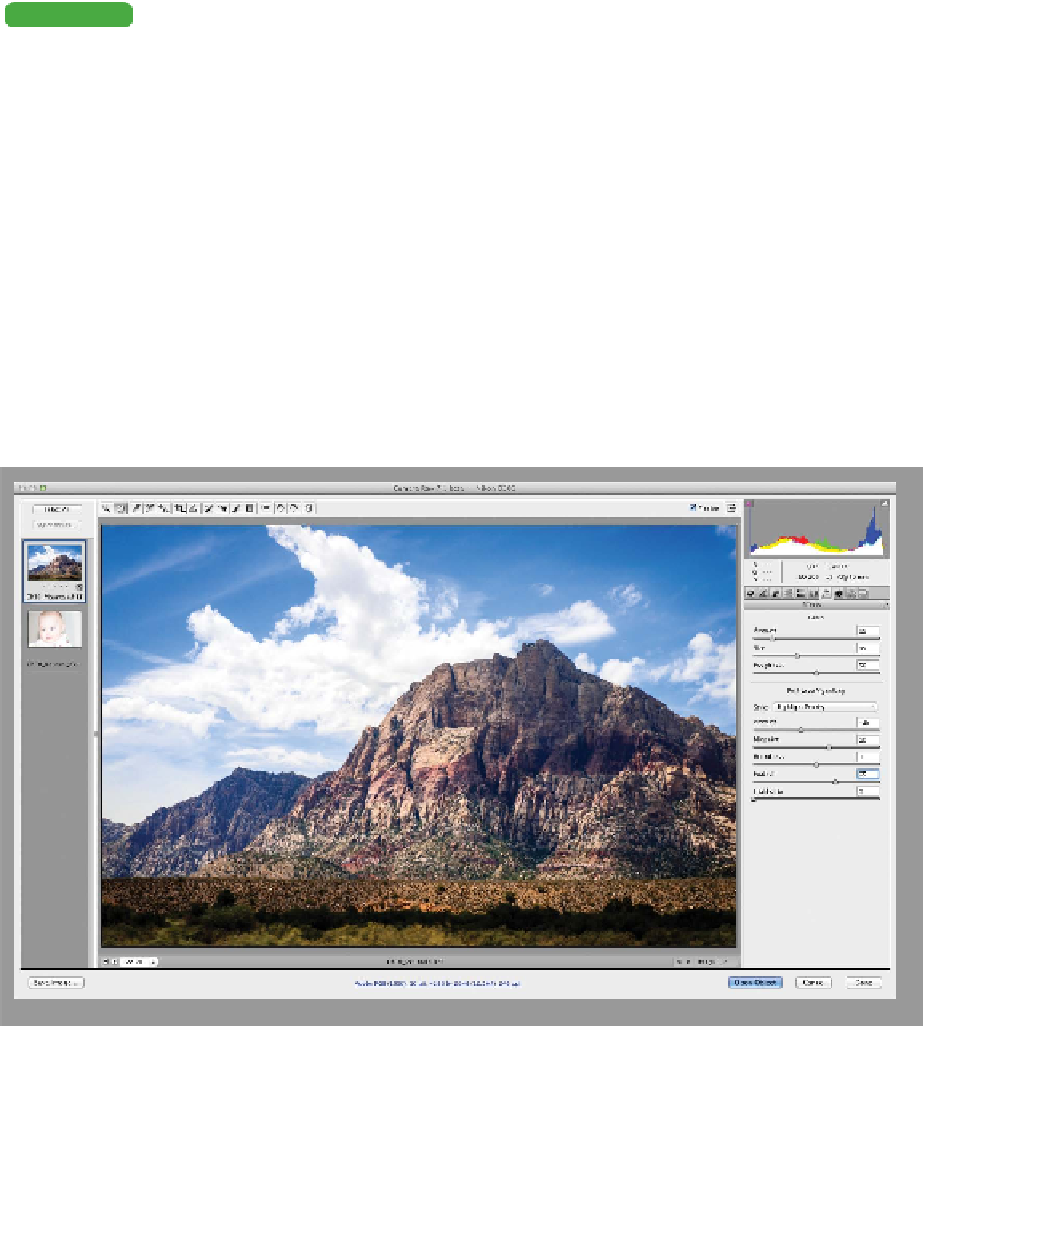
You c a n u s e a p o s t c r op v i g net t e t o s t yl i z e t he i m a g e s e d g e s :
•
Style. You'll l l i find t h r e e d i f fe r e nt opt ion s for how t he
vignette shades the image. The default, Highlight variety,
works best for this image.
•
Amount. Use a negative value to darken the edges or a
positive to brighten them. For this image, enter -25.
•
Midpoint. Controls how close the vignette appears to the
corner of the image. Enter 60 to push out the edges.
•
Roundness. A positive value creates a circular effect,
whereas a negative value takes on an oval shape. The
default is fine for this image.
•
Feather. Can create a gentler transition between the
affected areas. The default is fine for this image.
Tip
More Practice
You'll find additional raw files in the
Chapter 10 folder to practice with.
These include overexposed and
underexposed images as well as
grainy and noisy images for cleanup.
•
Highlights. If you're using a very dark vignette, the High-
lights slider can be used to protect the brightest tones in
your image.
5.
Make sure the Preview check box is selected, and then click
the Camera Calibration tab.