Graphics Programs Reference
In-Depth Information
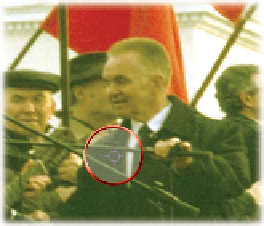
Color cast
video 62:
Correcting Color Cast
with Levels
In the first Levels example you made a Levels adjustment to all the
channels evenly. In the Auto-Levels example, you let Photoshop
adjust the levels and remove color cast using an automated algo-
rithm. The Levels command can be further isolated to a specific
channel by clicking the drop-down list in the center of the Levels
dialog box. This allows you to tackle color cast issues, such as spill
from a background, a bad white balance, or a photo shot under
mixed or colored lighting.
video 63:
Adjusting Levels
per Channel
1.
Close any open files, and then open the file
Ch10_Levels_Color_Balance.tif from the
Chapter 10 folder. Notice how the image has
a greenish tint.
2.
Add a Levels adjustment layer using the
Adjustments panel. You will use the Levels
command to fix color and exposure issues.
3.
Select the Set White Point (white eyedrop-
per) in the Levels dialog box. Click an area
that should be pure white. For this image,
click a bright area in the white pillar. If you
click an area that is not bright
enough, the whites in the image
will overexpose. (You can click
the Reset button—it looks like a
circular arrow—at the bottom of
the Adjustments panel to reset
the Levels command, if needed.)
After you click, you'll see that
some of the color spill has been
removed.
4.
Select the Set Black Point (black eyedropper)
in the Levels dialog box. Click an area that
should be pure black. Choose an area such as
a jacket or a dark shadow. This will adjust the
color balance and the exposure.
5.
The image's color balance should now be bet-
ter. Adjust the middle Input Levels slider to
brighten the image.