Graphics Programs Reference
In-Depth Information
You c a in mo d i f y t he fol low i in g br u s h t ip s h a p e opt ion s i in t he
Brushes panel by clicking the words Brush Tip Shape:
•
Size. Controls the size of the selected brush. You can enter
a value in pixels (px) or drag the slider to a new size.
•
Use Sample Size. Resets the brush to its original diameter.
This is only visible if the brush was created by sampling pixels
(such as part of a photo or a scanned brush stroke painted on
paper or canvas).
•
Flip X. Changes the direction of a brush by flipping it on its
X-axis (essentially making a mirrored image). This is useful if
the brush is asymmetrical.
•
Flip Y. Flips the brush on its Y-axis.
•
Angle. Specifies the angle of a brush. This works well for
sampled or elliptical brushes. You can type in a number of
degrees or visually change the angle of the brush by dragging
the arrow in the brush preview interface. You can use angled
brushes to create a chiseled stroke.
•
Roundness. Specifies the ratio between the short and long
axes. A value of 100% results in a rounder brush, whereas 0%
creates a linear brush. Elliptical shapes can be used to create
natural-looking strokes.
video 38:
Creating Custom
Brushes
NoTe
How Big Can Brushes Be?
In Photoshop CS6, brush size diam-
eter can go up to 5000 px. That's
a lot bigger than you'll likely need,
so be sure to pay attention to your
brush size.
NoTe
Where Did My Brush Go?
Can't see a brush preview? Check if
you've pressed the Caps Lock key.
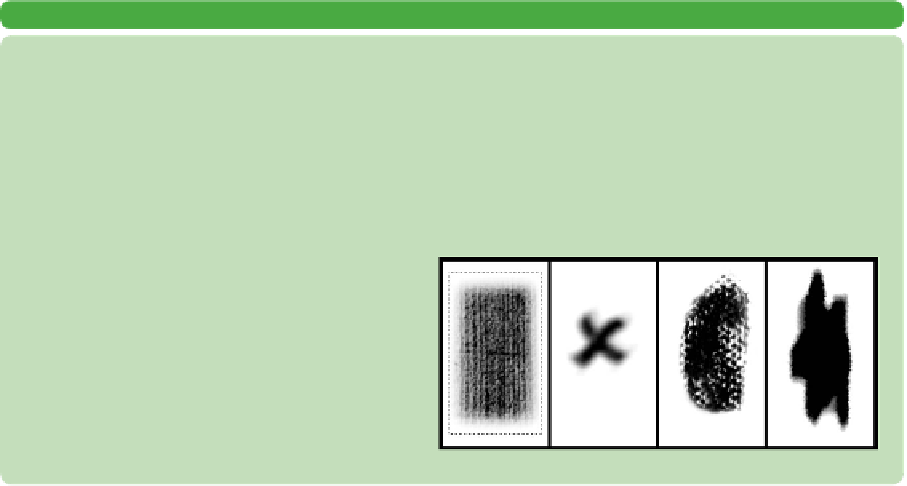
CREATING CUSTOM SAMPLED BRUSHES
You can use an image to create a custom brush. This image can be a scan that you input or a stroke that you draw
using other brushes. Let's give it a try:
1. Open the file Ch06_Brushes_to_Sample.tif from the Chapter 6 folder.
2. Select the first brush shape using the Rectangular Marquee tool. You can sample an image in size up to 2500
pixels x 2500 pixels.
3. Choose Edit > Define Brush Preset. A new box opens for naming the brush.
4. Name the brush and click OK. The brush is
added to the set you currently have loaded in
the Brushes panel.
5. Activate the new brush and paint in a new doc-
ument to experiment with it. You might want
to adjust the Spacing option to your preference.
6. Repeat for the other three brush shapes.