Image Processing Reference
In-Depth Information
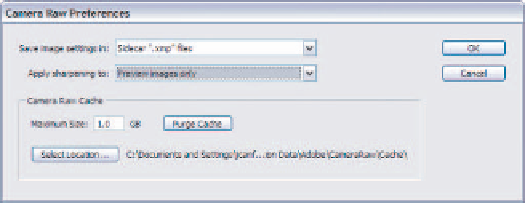
Figure 3.28
To prevent your converted files
from having the Sharpness set-
ting applied, select Apply to Pre-
view images only in the
Preferences dialog.
Photoshop Elements users don't have this advantage though, because the version
of Camera Raw included in Elements doesn't have a Preferences option. For users of
this version, the safest method is to leave the Sharpness slider set to 0. You can make
this the default for Camera Raw by setting the slider to 0 and selecting Set Camera
Default from the settings menu.
Note:
As an alternative, you can use the control during the editing phase and then set it to 0 before
converting. I don't always remember to do this, though. The good news is that you can always reconvert
the image if needed—yet another reason to love RAW!
69
I'll cover the basics of post-conversion sharpening in Chapter 7, “Finishing
Touches,” along with the other common post-conversion options such as resizing and
saving your images.
Summary
Once again we've covered a lot of ground in this chapter. Knowing what each of the
controls in Adobe Camera Raw does and understanding how they interact with each
other are critical parts of the RAW workflow. Camera Raw will allow you to make
adjustments to your images that would be impossible or extremely difficult in Photo-
shop Elements or Photoshop CS. Best of all, Camera Raw makes those adjustments
using the full information stored in your RAW file. If you decide you don't like the set-
tings after your conversion, the original RAW file is still available to you, ready for the
next experiment.
I hope this chapter has helped you understand how each of the controls works
and has shown you how important the histogram is.


Search WWH ::

Custom Search