Image Processing Reference
In-Depth Information
55
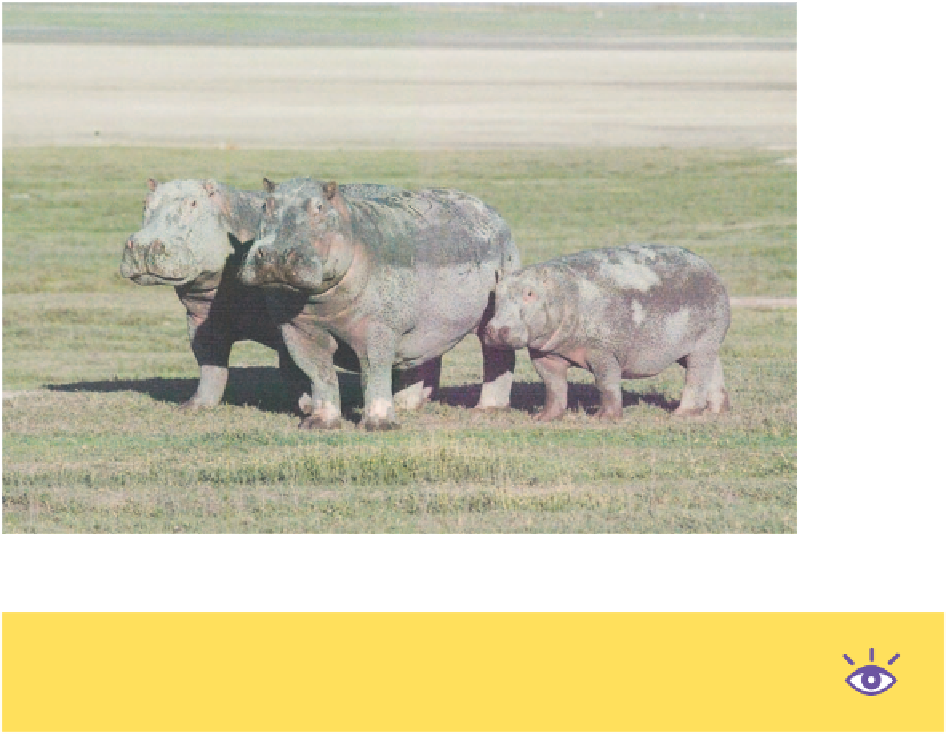
Figure 3.8
Shooting in RAW saved this image from the trashcan. No other format would have allowed such drastic editing.
Note:
Don't forget the Alt/Option key and slider adjustment combo that changes the preview display
to help you determine problems when making exposure adjustments. Holding the key down while drag-
ging the Shadows slider will turn the preview area into a clipping display.
Correcting Overexposure
Camera Raw's ability to correct an overexposure is excellent. Of course, that doesn't
mean you can shoot without worrying about your exposure, but the RAW format does
offer more latitude when making image corrections than other formats will. Unlike
conventional tools, such as the Levels command, Camera Raw can recover highlight
detail with a much greater amount of control. In fact, if there is still image data in even
one color channel, Camera Raw can recover that detail. Of course, the more color
channels that contain data, the better the recovery will be—but seeing how much can
be gained from even one channel is pretty impressive. Figure 3.9 shows an image that is
overexposed in the clouds. Notice that the histogram shows a spike on the right, or
highlight side, and mostly in the blue channel.
I start off by moving the Exposure slider to the left, taking away light from the
image. At -0.60, the highlights are no longer clipped. I can verify this by holding down
the Alt/Option key while dragging the Exposure slider, which shows that no data is
being clipped. Figure 3.10 shows the image after adjusting the exposure.


Search WWH ::

Custom Search