Image Processing Reference
In-Depth Information
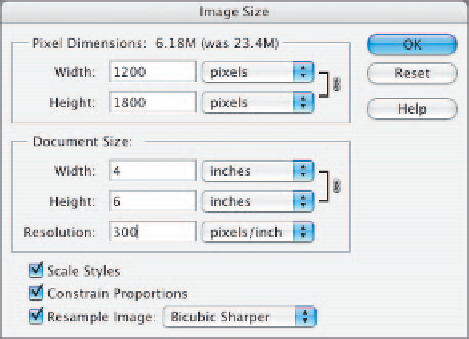
Figure 7.12
Image Size is used after the con-
version to resize an image file for
a specific use.
To access this dialog, choose Image
>
Resize
>
Image Size (Photoshop Elements)
or Image
>
Image Size (Photoshop).
For printing, enter the Width or Height in the Document Size fields for the final
print. For web or screen use, enter a Width or Height in the Pixel Dimensions fields.
134
Note:
If you leave Constrain Proportions checked—and I recommend that you do to avoid distorting the
image—set the important dimension, either width or height. The other dimension will be set automatically.
Resample Image offers several options. For photographic images, there are only
three options that will give good results.
Bicubic
is the standard method and does a good job for most images.
Bicubic Smoother
is the best choice when
enlarging
images and will do the best
job of interpolation when adding pixels to create a larger image.
Bicubic Sharper
is a good choice when
reducing
image size. This option can
oversharpen a image, though, so if the resized photo appears too sharp, use stan-
dard Bicubic.
Sharpening
Back in Chapter 3, I discussed sharpening in Camera Raw and I recommended that you
wait until all image edits and resizing were done before applying any sharpening to
your converted RAW files.
Photoshop Elements and Photoshop offer several options to sharpen images, all
of which are found under Filters
>
Sharpen. The chief one that I recommend using,
though, is Unsharp Mask. This filter gives you complete control over how your images
are sharpened and can be adjusted for different needs.
Note:
For more detailed information on sharpening images, I recommend
Photoshop Sharpening,
an
e-book by Tim Grey. It's available at
www.sybex.com
.


Search WWH ::

Custom Search