Image Processing Reference
In-Depth Information
Figure 7.8
After copying the Background
and selecting the layer mask, the
image will be all white.
7.
For the final step, select Filter
>
Blur
>
Gaussian Blur, and set a radius of 30.
(This is personal preference, but I find that 30 is a good starting point and
works for many images. Some images may need much less or quite a bit more.
You'll need to experiment to determine the right level for the image you're work-
ing on.) Select the Background, and your image will look like Figure 7.10.
132
Figure 7.9
After pasting the Background into the layer mask,
a black-and-white version of the image will be displayed.
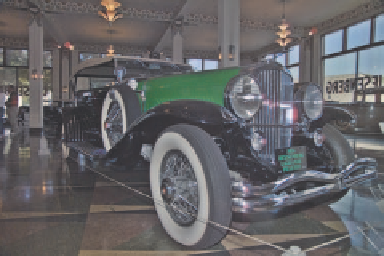
Figure 7.10
After applying a Gaussian Blur and selecting the
Background, the combined image shows a much wider
dynamic range than the original images.
Photoshop Elements doesn't have layer masks, so combining images takes quite
a bit more work. Steps 1 and 2 are the same as with the Photoshop method. However,
in Elements, you need to erase dark areas of the image to reveal the highlights. By
changing the Opacity of the eraser, some of the dark will be left, building density in the
image. Photoshop Elements users should follow these alternative steps:
3.
After copying the dark image to a new layer of the light image, make sure Layer
1 is selected in the Layers palette.
4.
Select the Eraser tool and lower the Opacity to 45 percent in the Options
bar. Select a brush size that will work with the area you want to erase, and erase
the areas in which you want to restore light detail.


Search WWH ::

Custom Search