Image Processing Reference
In-Depth Information
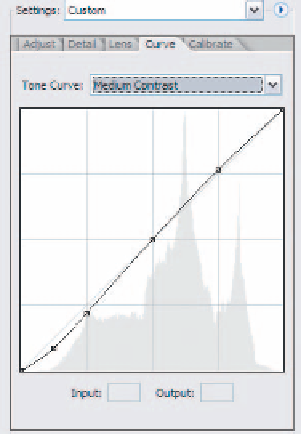
Using the Curves Control
If the adjustments made with Exposure, Brightness, Shadows, and Contrast on the
Adjust tab aren't quite what you want, the next stop will be the Curves tab, shown in
Figure 6.17. The Tone Curve dropdown includes four preset options:
Linear
No additional contrast adjustment is performed on the RAW file prior to con-
version. This method is used by the Photoshop CS/Photoshop Elements 3 version of
Camera Raw.
Medium Contrast
This is the default setting for Camera Raw. It adds a little bit of con-
trast and is well suited to most RAW images.
Strong Contrast
This adds more contrast to the RAW image. It works for some images,
particularly images with strong bold lines, but it is not a good choice for portraits or
softer images.
Custom
You can add and move points along the curve to create your own contrast set-
tings. Any adjustment from the three other presets on the Tone Curve will automati-
cally change the setting to Custom. Up to 14 points can be created.
114
Figure 6.17
The Curves control in Camera
Raw can fine-tune adjustments
to shadow, highlight, and mid-
tone areas.
Note:
Readers who are interested in staying on top of the hottest new features should consider
downloading and installing the latest version of Camera Raw. Among future improvements, it will add
support for more of the latest camera models and it might include new tone curve settings.
The Curves control shows a tone curve over a histogram of image data. The
tone curve is used to adjust the image shadow, highlight, and midtones in a precise
manner, similar to the way Curves works in Photoshop. The real power of using Curves
in Camera Raw is that you are making these changes on the RAW data, giving you
more latitude with any adjustments made.


Search WWH ::

Custom Search