Image Processing Reference
In-Depth Information
Quick Fix Settings
The Process Multiple Files dialog in Photoshop Elements has a nifty feature that you
might be considering. The Quick Fix and Labels checkboxes on the right will apply the
Auto settings and Sharpen after the image has been converted. Here's my advice on
using these settings:
DON'T!
At this point, you've already made the correct adjust-
ments in Camera Raw so there's no point in letting Elements decide to change things
around. Sharpen should never be used, and certainly not at this point in the workflow.
Note:
Don't confuse Sharpen with Unsharp Mask. Sharpen is an automatic application of the filter
with no control over settings. Unsharp Mask, on the other hand, gives you full control over how your
image is sharpened.
You can use the Labels option to place text directly on your images. It's sort of
like the date imprints from some of point-and-shoot film cameras. Do you really want
text plastered onto your image? Probably not. However, you might want to mark your
images when converting them for web use. In that case, a copyright notice might be
appropriate (Figure 5.15).
98
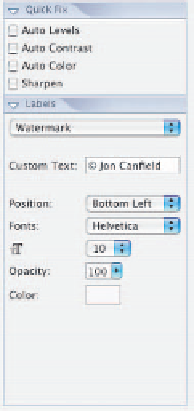
Figure 5.15
The only time I would use the
Labels option during conversion
would be to place a copyright
notice on an image destined for
the Web.
To place a copyright notice, select Watermark from the dropdown list. In the
Custom Text field, enter the text you want to appear in the converted image. Select a
position, either Bottom Left or Bottom Right (unless you want to be bold and place
your text in the center of your image), and then set the Opacity and color of your text.
Note:
To insert the copyright symbol ©, press Opt+G (Macintosh) or Alt+0169 on the numeric pad
(Windows).


Search WWH ::

Custom Search