Image Processing Reference
In-Depth Information
Here's the converted image, with and without Luminance Smoothing applied.
Compare the shadow areas of the image on the left with the same area on the right
(Figure 4.7). There is less random variation in tone with the corrected image on the
right. It's a subtle difference here, but in a larger print the change is very apparent.
Figure 4.7
(left) Before and (right) after Luminance Smoothing. Note the differences in the shadow areas. The after image is
smoother, with fewer variations in tone.
76
Controlling Noise with Color Noise Reduction
If you have green or magenta speckles in your image, particularly in dark areas, or you
see these speckles around highlights in the image, you are a victim of color noise. The
problem is particularly bad at higher ISO settings and with longer exposures. Color
noise shows up even more with high-resolution compact cameras that pack more pho-
tosites into a smaller area, resulting in sensors that are more sensitive to light than their
digital SLR counterparts that use larger sensors.
The method of correcting color noise is very similar to the one used previously
for luminance noise. Start off by zooming in as much as needed to see detail in the
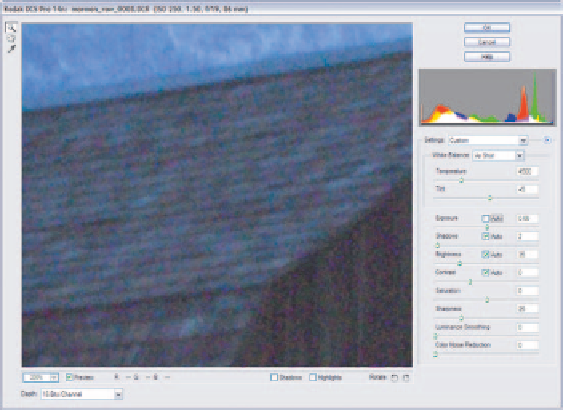
problem area of your image (Figure 4.8).
Figure 4.8
After zooming in on the problem
area, the color noise problems are
obvious in this image. All of the
green and magenta splotches are
signs of noise.


Search WWH ::

Custom Search