HTML and CSS Reference
In-Depth Information
Note that you can leave off the value and simply include the name of the
control
attribute; however, that is not valid syntax for XHTML documents. This topic will con-
tinue to follow the convention of always including attribute values even when they're not
strictly required by most browsers.
Figure 7-8
attributes of the audio element
Attribute
Description
autoplay=”autoplay”
Starts playing the audio clip as soon as it is downloaded
controls=”controls”
Displays the audio controls in the Web page
loop=”loop”
Automatically restarts the audio clip when it is finished playing
preload=”
type
”
Specifies whether the audio clip should be preloaded by the browser,
where
type
is
auto
(to load the entire clip),
metadata
(to preload only
descriptive data about the clip), or
none
(not to preload the audio clip)
src=”
url
”
Specifies the source of the audio clip, where
url
is the location and name
of the audio file
You can create a background sound for your Web page by adding the following
audio
element to your HTML file:
<audio controls=”controls” autoplay=”autoplay” loop=”loop”>…</audio>
The audio file starts playing automatically when the page is loaded and then loops
back to the beginning when the end of the clip is reached to start playing again.
By default, audio controls are displayed in-line with text-level elements. To display the
controls as a block, you must apply a style rule to the
audio
element. You'll add controls
to the overture clip now and then create a style rule for the
audio
element.
Provide background sound
only when you have the
audio controls prominently
displayed on your page so
that users have a way of
turning off the music.
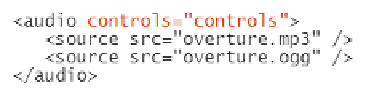
To add controls to the audio clip:
◗
1.
Add the attribute
controls=”controls”
to the
audio
element, as shown in
Figure 7-9.
Figure 7-9
adding audio controls
display controls
for the embedded
audio clip
◗
2.
Scroll to the top of the file and add the following
link
element directly below the
link to the
jp.css
style sheet:
<link href=”clips.css” rel=”stylesheet” />
◗
3.
Save your changes to the file, and then open the
clipstxt.css
file in your text edi-
tor. Enter
your name
and
the date
in the comment section of the file, and then
save it as
clips.css
.