Graphics Programs Reference
In-Depth Information
If you're looking at a photo and the corners of the photo appear darker, that's
lens vignetting. Generally, I look at it this way: If it's just the corners, and they're
just a little bit dark, that's a problem and I fix it. However, sometimes I want to
focus the viewer's attention on a particular area, so I create a vignette, but
I expand it significantly beyond the corners, so it looks like an intentional
soft spotlight effect. Here's how to fix (or create) vignettes:
How to Fix It
Add It for Effect
and How to
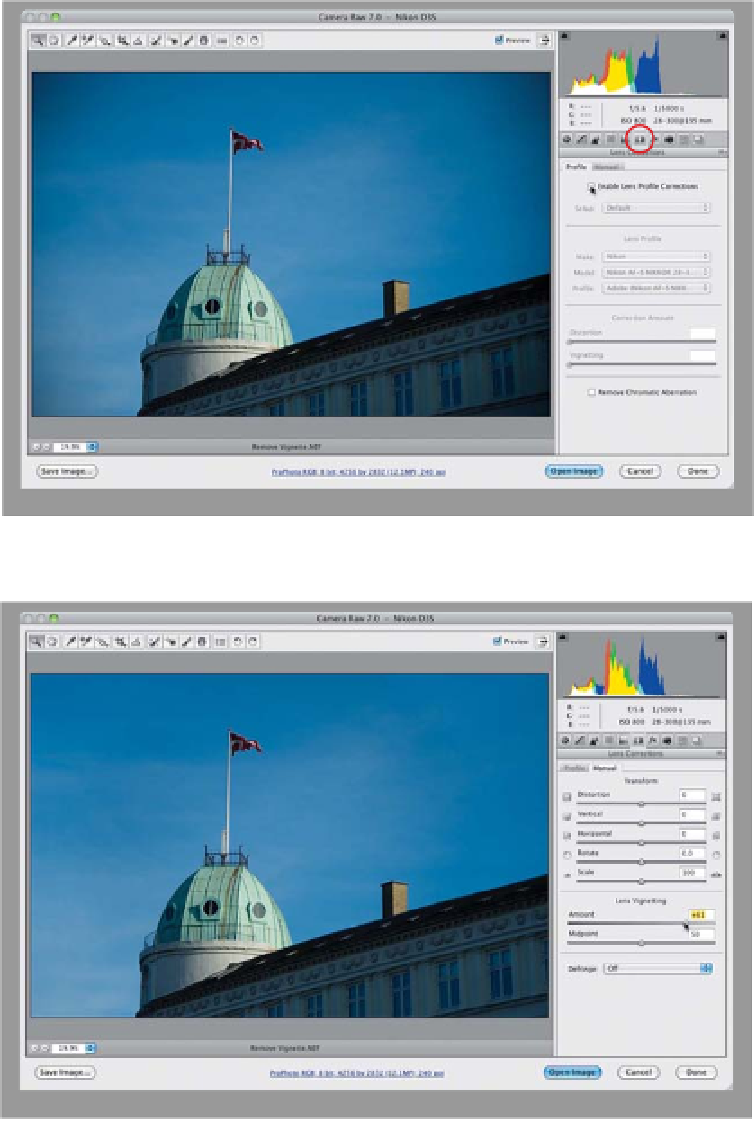
Step One:
Here, you can see the dark areas in
the corners (that's the bad vignetting).
This is normally caused by the camera's
lens, so don't blame yourself (unless you
bought a really cheap lens—then feel
free to give yourself as much grief as you
can bear). To remove this vignetting from
the corners, start by clicking on the Lens
Corrections icon (the sixth icon from
the left) at the top of the Panel area.
In the Profile tab, turn on the Enable
Lens Profile Corrections checkbox and
Photoshop tries to remove the edge
vignetting based on your lens' make
and model (it learns this from your im-
age's EXIF data. See page 66 for more
on this). If the image still needs cor-
recting, try the Vignetting slider under
Correction Amount.
Step Two:
If the automatic way just isn't working,
do it manually by clicking on the Manual
tab. In the Lens Vignetting section, click
on the Amount slider and drag it to the
right until the vignetting in the corners
disappears. Once you move the Amount
slider, the Midpoint slider beneath it be-
comes available. It determines how wide
the vignetting repair extends into your
photo, so drag it to the left to expand
the lightening farther toward the center
of your photo.