Graphics Programs Reference
In-Depth Information
Earlier versions of Camera Raw have had lens correction features, but Camera
Raw can now automatically apply corrections for common lens problems (like
barrel or/and pin-cushion distortion, or edge vignetting). It does this by reading
the embedded camera data (so it knows which camera and lens you used), and it
applies a profile to fix the problem. It's amazingly fast, and it takes just one check-
box, but what if there is no profile for your camera/lens, or there's no EXIF data for
your image (maybe you scanned it), or if you don't like the profile (it was too little
or too much)? You're about to learn all of that.
Fixing Lens
Problems
Step One:
Open the image with a lens problem in
Camera Raw. Now, if you've been using
Photoshop for a while, you already know
there's a Lens Correction filter found
under Photoshop's Filter menu, and
they've updated that with pretty much
the same features as the Camera Raw
version, but it's better to do the correc-
tion here because: (1) it's non-destructive,
and (2) it's faster. So I always fix lens
problems here, rather than using the
Photoshop filter.
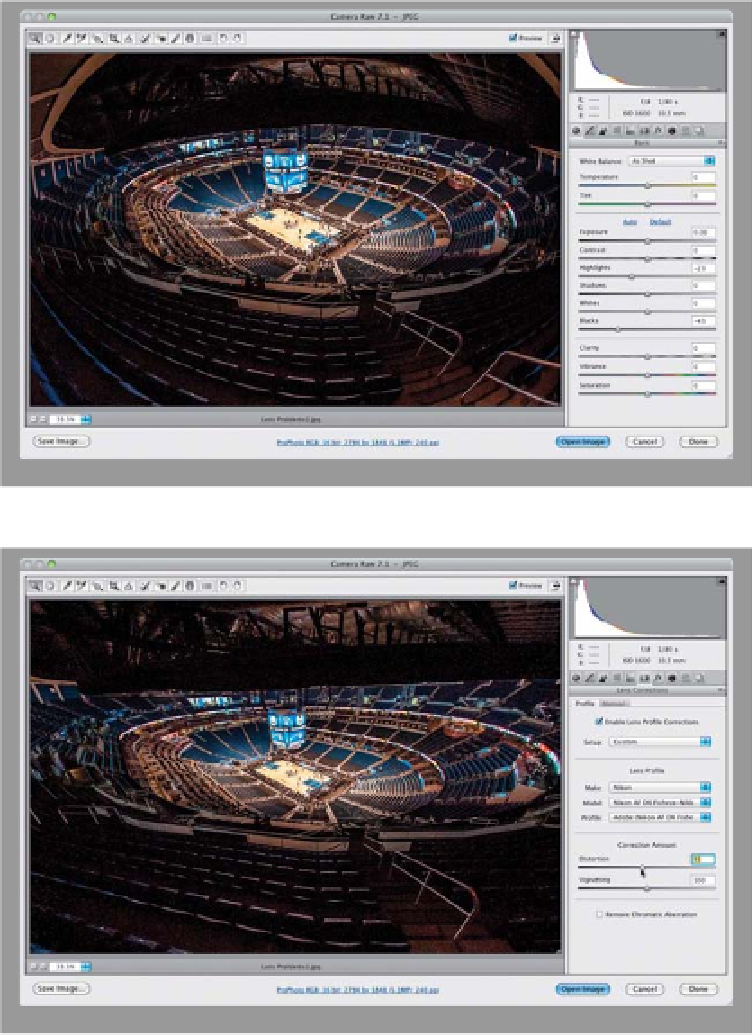
Step Two:
Click on the Lens Corrections icon (the
fifth icon from the right at the top of the
Panel area) and on the Profile tab, turn
on the Enable Lens Profile Corrections
checkbox. Now, chances are that you're
done. Boom. It's fixed. That's because,
as I said above, it looks at the camera
data embedded in the shot to find out
which camera and lens you used, then it
searches its internal database for a pro-
file of that lens, and it immediately fixes
the photo (as seen here). If it can't find a
profile, it lets you know at the bottom of
the panel (as seen in the next step). Also,
I usually have to back down the amount
of correction just a bit with fisheye lenses
by dragging the Distortion slider a little
bit to the left (as seen here).