Graphics Programs Reference
In-Depth Information
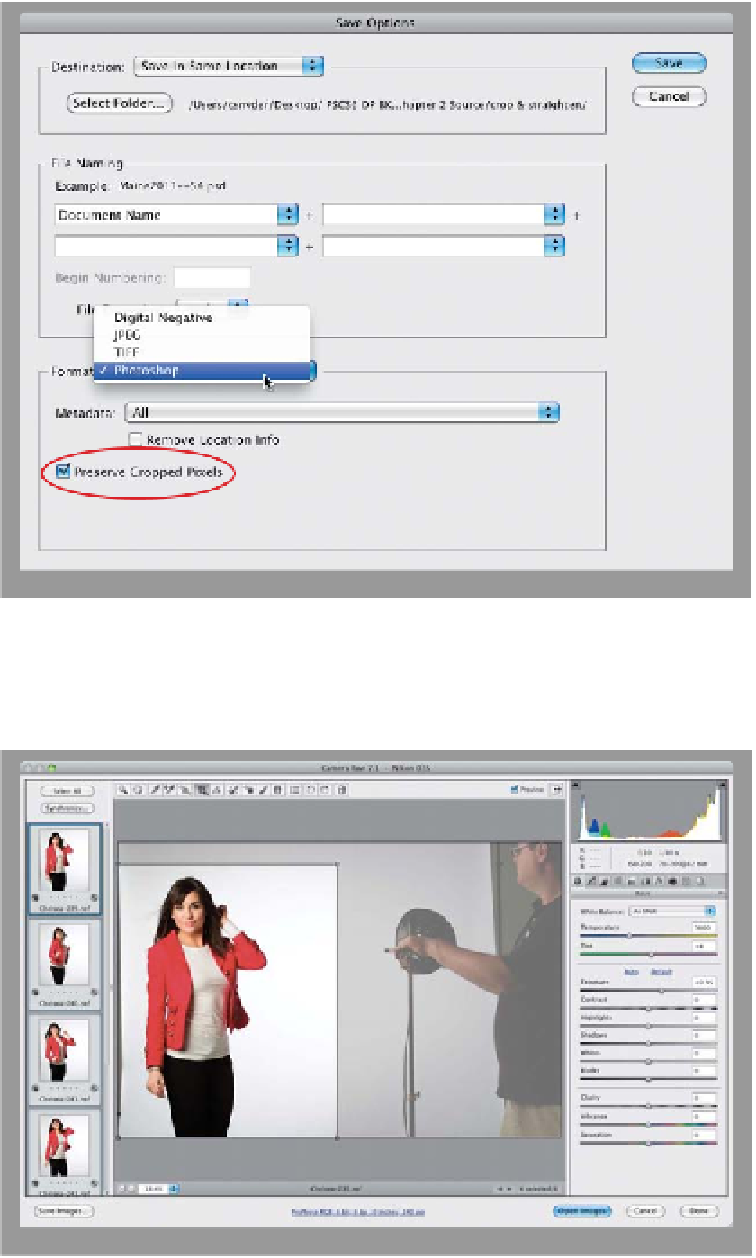
Step Five:
If you save a cropped JPEG or TIFF
photo out of Camera Raw (by clicking
the Done button), the only way to bring
back those cropped areas is to reopen
the photo in Camera Raw. However, if
you click the Save Image button and
you choose
Photoshop
from the Format
pop-up menu (as shown), a new option
will appear called Preserve Cropped
Pixels. If you turn on that checkbox be-
fore you click Save, when you open this
cropped photo in Photoshop, it will ap-
pear to be cropped, but the photo will
be on a separate layer (not flattened on
the Background layer). So the cropped
area is still there—it just extends off the
visible image area. You can bring that
cropped area back by clicking-and-drag-
ging your photo within the image area
(try it—use the Move tool
[V]
to click-
and-drag your photo to the right or left
and you'll see what I mean).
Step Six:
If you have a number of similar photos
you need to crop the same way, you're
going to love this: First, select all the
photos you want to crop in Camera Raw
(either in Mini Bridge or on your com-
puter), then open them all in Camera
Raw. When you open multiple photos,
they appear in a vertical filmstrip along
the left side of Camera Raw (as shown
here). Click on the Select All button (it's
above the filmstrip) and then crop the
currently selected photo as you'd like.
As you apply your cropping, look at the
filmstrip and you'll see all the thumbnails
update with their new cropping instruc-
tions. A tiny Crop icon will also appear in
the bottom-left corner of each thumbnail,
letting you know that these photos have
been cropped in Camera Raw.