Graphics Programs Reference
In-Depth Information
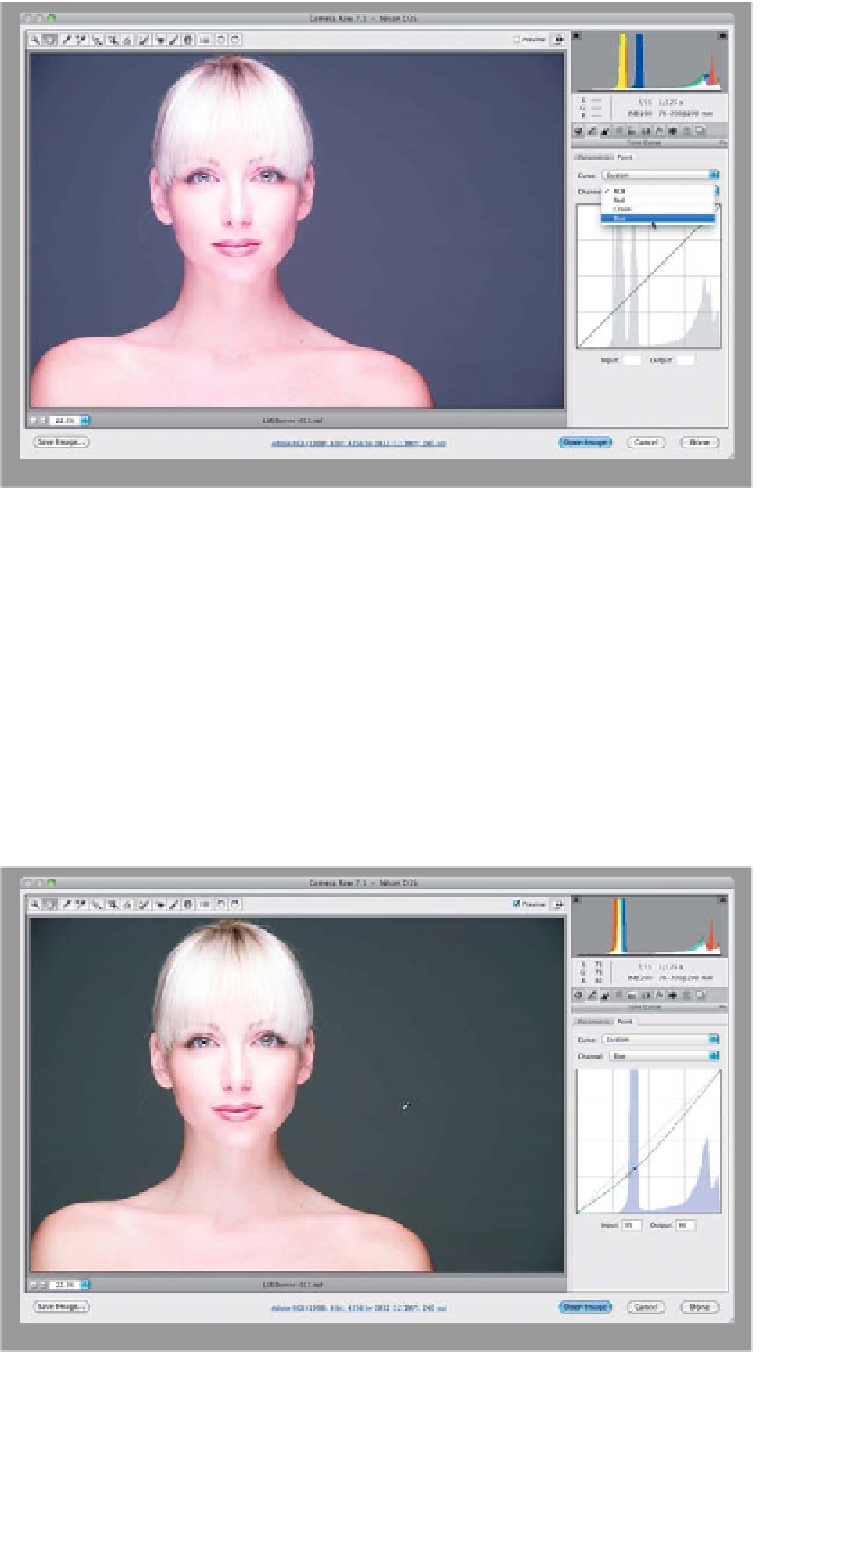
Step Nine:
Before we finish up with curves, there's
another new feature in the CS6 version
of Camera Raw, and that's the ability to
tweak the individual RGB curves in the
Point curve. Although this works great
for creating cross-processing effects
(which we'll cover in a moment), you'll
probably wind up using it most for fix-
ing tough white balance problems (like
a color cast that just won't go away).
You choose which channel you want to
adjust by going to the Point tab, and
then choosing the individual channel
from the Channel pop-up menu (as
shown here, where I'm choosing Blue
to help me remove a color cast from
the background and her skin—the
background is supposed to be solid
gray, and her skin isn't supposed to
be bluish).
Step 10:
So, now that you have just the Blue
channel selected (notice that the Curve
readout is now tinted blue, as well, as a
visual cue to you that you're adjusting just
this one channel), how do you know which
part of the curve to adjust? You can get
Camera Raw to tell you exactly which part
to adjust. Move your cursor over the back-
ground area you want to affect, press-
and-hold the
Command (PC: Ctrl) key
,
and your cursor temporarily changes into
the Eyedropper tool. Click once on your
image and it adds a point to the curve
that corresponds to the area you want to
adjust. Now, click on that curve point and
drag at a 45° angle down toward the bot-
tom-right corner, and it removes the blue
from the background (as seen here).