Graphics Programs Reference
In-Depth Information
Step Seven:
Another advantage of the Parametric
curve is that you can use the region
divider controls (under the curve) to
choose how wide a range each of the
four sliders covers. So, if you move the
far-right region divider to the right, it
expands the area controlled by the
Lights slider. Now the Highlights slider
has less impact, flattening the upper
part of the curve, so the contrast is
decreased. If I drag that same region
divider control back to the left instead
(shown here), it expands the Highlights
slider's area, which steepens the curve
and increases contrast.
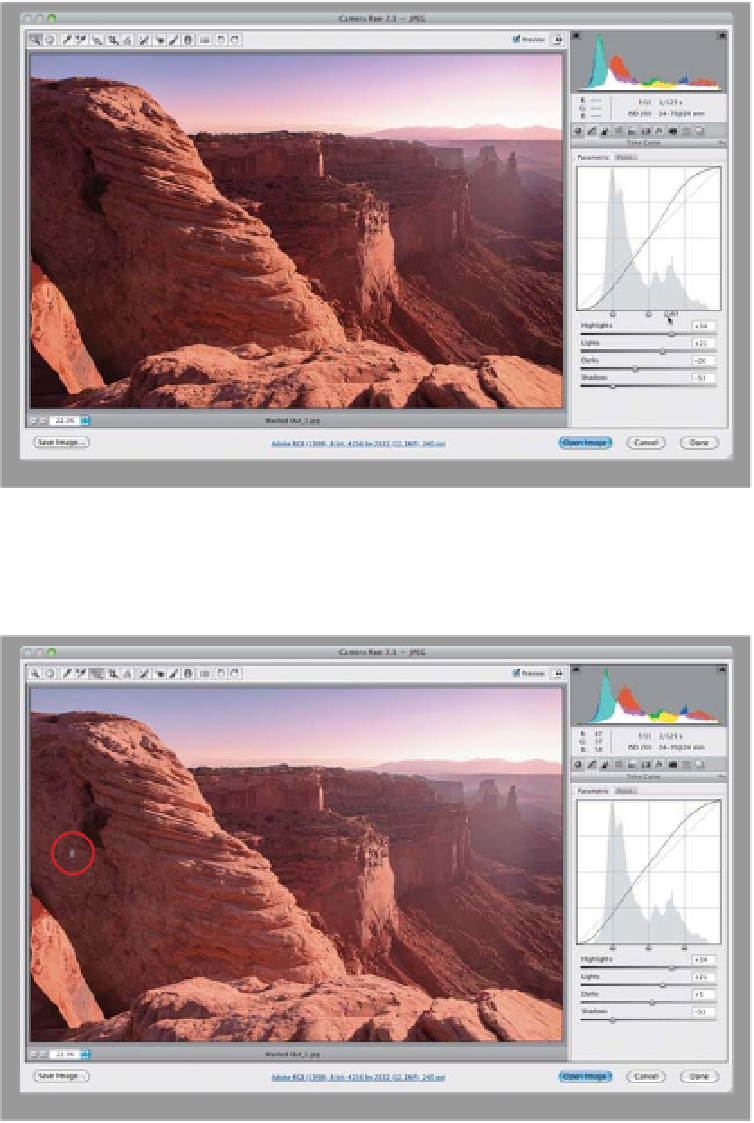
Step Eight:
If all of this makes you a bit squeamish,
have I got a tool for you: it's called the
Targeted Adjus tment tool (or TAT for
short) and you'll find it up in the toolbar
at the top of the window (it's the fifth tool
from the left, shown circled here). Just
move the tool over the part of the image
you want to adjust, then drag upward to
lighten that area, or downward to darken
it (this just moves the part of the curve
that represents that part of the image).
A lot of photographers love the TAT, so
make sure you give it a try, because it
makes getting that one area you want
brighter (or darker) easier. Now, there is
one caveat (I've been waiting to use that
word for a while), and that is: it doesn't
just adjust that one area of your photo—it
adjusts the curve itself. So, depending on
the image, other areas may get lighter/
darker, too, so just keep an eye on that
while you're adjusting. In the example
shown here, I clicked and dragged up-
ward to brighten up that shadowy area
on the left, and the curve adjusted to
make that happen automatically.
(Continued)