Graphics Programs Reference
In-Depth Information
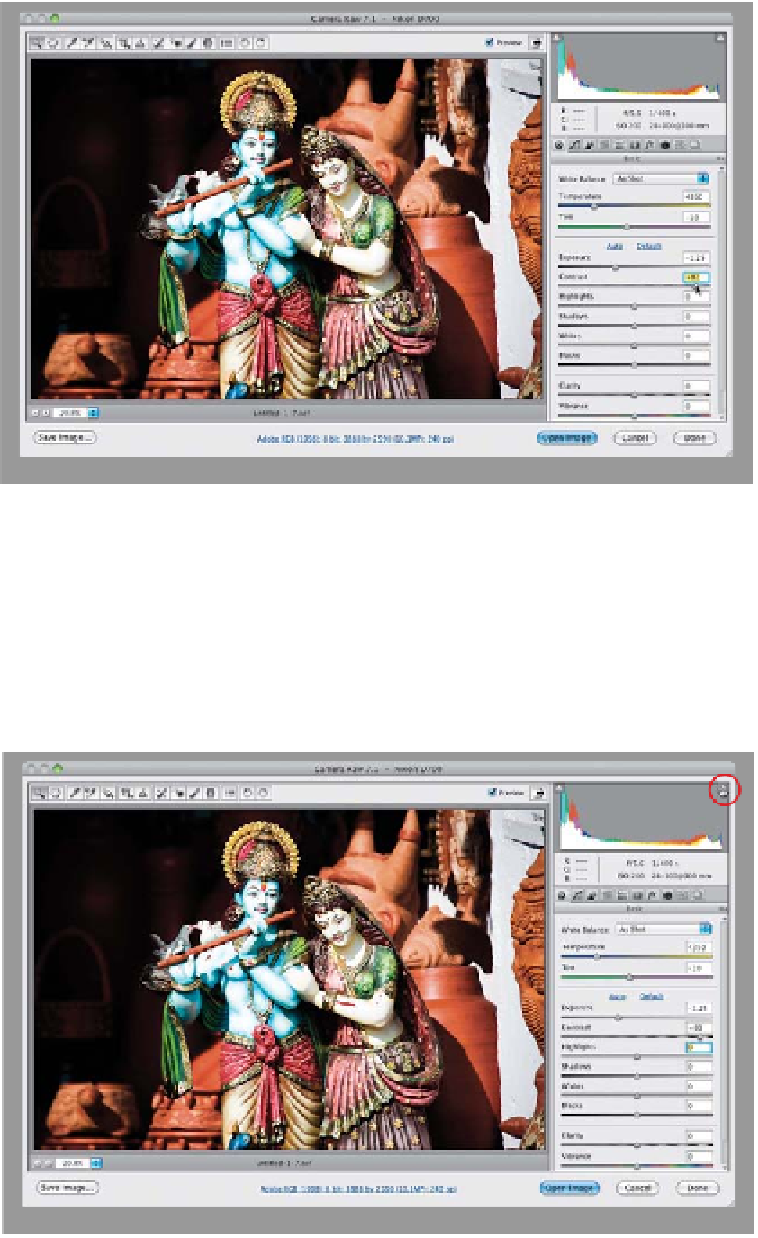
Step Three:
In previous versions of Camera Raw,
when I saw an image looking flat like
this one did back in Step Two, I would
reach for the Blacks slider, but in CS6,
now you increase the contrast using the
Contrast slider, which makes the bright
areas brighter and the dark areas darker
(here, I dragged it to the right to +82,
which helped deal with the flat, low-
contrast look). These two steps—adjust-
ing the Exposure and then the Contrast
slider (if necessary)—should be your
starting points every time. This top-down
approach helps, because the other sliders
build off this exposure foundation, and it
will keep you from having to constantly
keep tweaking slider after slider. So, think
of these two as the foundation of your ex-
posure, and the rest are kind of optional
based on the image you're working on.
Step Four:
Before we go any further, increasing our
contrast to where we wanted it created
a clipping problem, meaning we are clip-
ping off our highlights (part of our photo
got so bright that it won't have any de-
tail in that area at all. It's blown out. If
all that sounds bad, well, that's 'cause it
is). Luckily, Camera Raw will give you a
warning if you're clipping, in the upper-
right corner of the histogram. See that
triangle? That's the highlight clipping
warning (although I just call it “the white
triangle of death”). Now, if you do see
a white triangle, don't freak out. First,
go up and click directly on that white
triangle and the areas that are clipping
will appear in red (look on her arm).
We do this to find out if what's clipping
is an area of important detail, or if it's
like a tiny highlight on a chrome bumper
or something meaningless in the back-
ground of your image.
(Continued)