Graphics Programs Reference
In-Depth Information
Photoshop Killer Tips
for Show Transform Controls. This leaves
the Free Transform handles visible all the
time, around any selection or object on a
layer, so all you have to do is grab a cor-
ner point and drag (of course, press-and-
hold the Shift key to keep things resizing
proportionally).
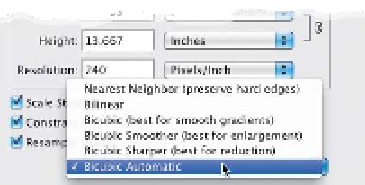
Not Sure Which Method to
Choose for Resizing Your Image?
Let Photoshop Choose
If having to choose which interpolation
method to use when resizing made your
head hurt (and it did for a lot of folks),
then you'll be happy to see the new de-
fault is Bicubic Automatic, which means
Photoshop will automatically choose the
best one for what you want to do.
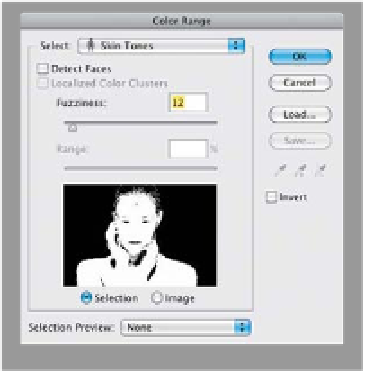
Detect Faces checkbox to refine it even
further. Then, drag the Fuzziness slider
(kind of like the Tolerance amount in the
Magic Wand tool) down to 1 and see
what that looks like. If you need to raise
the amount to select more skin, drag it
to the right.
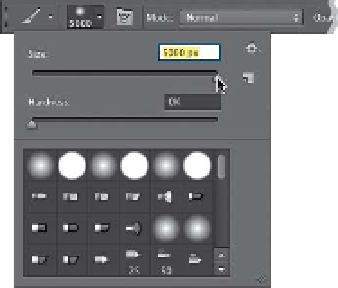
New Maximum Brush Size
Back in CS5, the maximum size you could
make any brush was 2,500 pixels, which
seems like a lot until you have all these
new DSLRs that are over 30 megapixels,
and all of sudden, your biggest brush isn't
big enough. That's why you'll be happy to
know, not only can you make your brush
sizes more than 2,500 pixels, you can go
all the way 5,000 pixels. Yeah, baby!
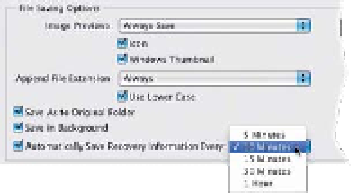
Saving Your Work Automatically
Photoshop is an amazingly stable pro-
gram (it hardly ever crashes for me, well…
unless I'm in front of an audience, then
it senses fear), but if for some reason
it does crash (hey, it happens), you're
not out of luck if you haven't saved the
document you're working on in a while.
Well, at least not in CS6, because there's
a new Auto Save feature that saves
your document automatically at what-
ever amount of time you choose. You
do this by going under the Photoshop
(PC: Edit) menu, under Preferences, and
choosing
File Handling
. At the bottom
of the File Saving Options section, you'll
New Trick for Selecting Skin Tones
If you have skin tones that needs ad-
justing (maybe your subject's skin tone
looks too red, but the rest of the photo
looks good, which is more common than
you might think), then you'll want to
know this new little tweak in Photoshop
CS6: if you go to under the Select menu
and choose
Color Range
, and then
New Power for the Eyedropper
If you've added an adjustment layer above
an image, and you use the Eyedropper
tool to sample a color from that image,
of course the color it picks is going to be
based on how the adjustment layer is af-
fecting that image, right? Right. However,
in CS6, you can now make the Eyedropper
tool ignore the effect of any adjustment
layer and, instead, sample from your image
layers. You do this by choosing
All Layers
No Adjustments
from the Sample pop-up
menu in the Options Bar.
see the Automatically Save Recovery
Information Every checkbox and a pop-
up menu set to 10 Minutes by default (so,
the most you can lose at any time is 10
minutes worth of work). But, if you can't
bear to lose even that, you can choose
5 Minutes, or go the other way and in-
crease the amount of time before it saves
(for the brave at heart).
from the Select pop-up menu at the
top of the dialog, choose
Skin Tones
, it
looks for flesh tones and selects them.
If you're just trying to select skin tones
in your subject's face, then turn on the