Graphics Programs Reference
In-Depth Information
Step 19:
Go ahead and duplicate that text layer
a few more times so you can add “pres-
tige.” and “passion.” and “pricey.” Just
kidding on that last one—how about
“per fec tion.” (ahhh, much bet ter)? Add
these over whichever clips you like best,
and position them where you want them,
as well (totally your call). Okay, one last
tweak before we save our movie—let's
add some motion to our photos. That's
right baby, we can make 'em move.
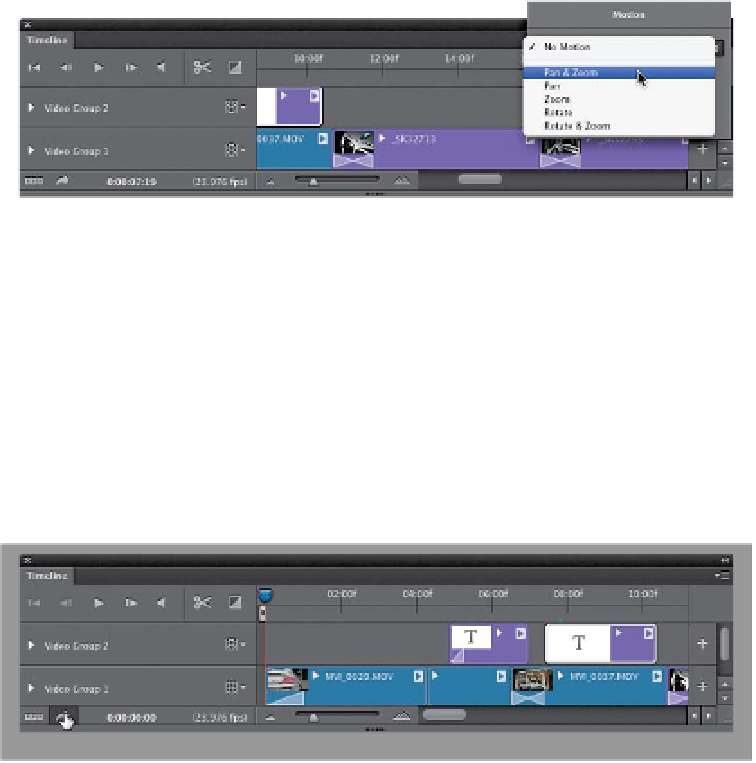
Go to the first photo, click on the little
triangle at the end of the purple bar,
and the Motion dialog appears. Choose
Pan & Zoom
from the pop-up menu
(as shown here) and now this still photo
moves slowly from side-to-side as it also
slowly zooms in tighter (it's a pretty cool
effect). Add any one of these motion
effects to as few, or as many, of the
photos as you like. Of course, go ahead
and play your entire video and make
sure it's just like you want it.
Step 20:
Now it's time to save out our project
as a movie (so we can share it, email it,
put in on YouTube, or our phones, etc.).
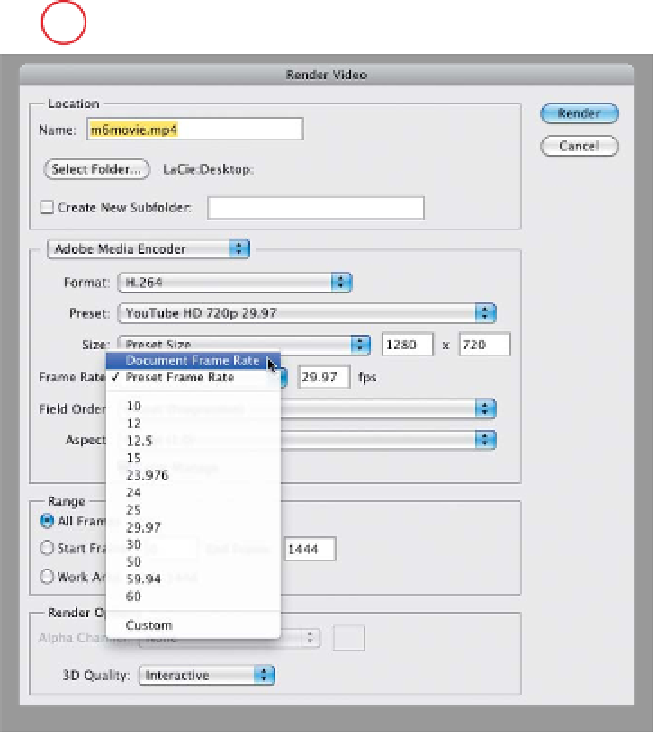
Click on the Render Video icon at the
bottom-left corner of the Timeline panel
(shown circled in red above), to bring up
the Render Video (export) dialog shown
here. Give your file a name, and then
from the Preset pop-up menu, choose
the format you want for your video (in
our case, we'll be sending our video to
YouTube). Lastly, this preset is choosing
29 fps, but we're not certain that's what
your camera shot, so to keep from hav-
ing jittery or jumpy video playback, from
the Frame Rate pop-up menu, choose
Document Frame Rate
, then click the
Render button. In about five (errrr…10?)
minutes your video is exported and
ready for upload (of course, play it once
to make sure everything came out the
way you wanted).