Graphics Programs Reference
In-Depth Information
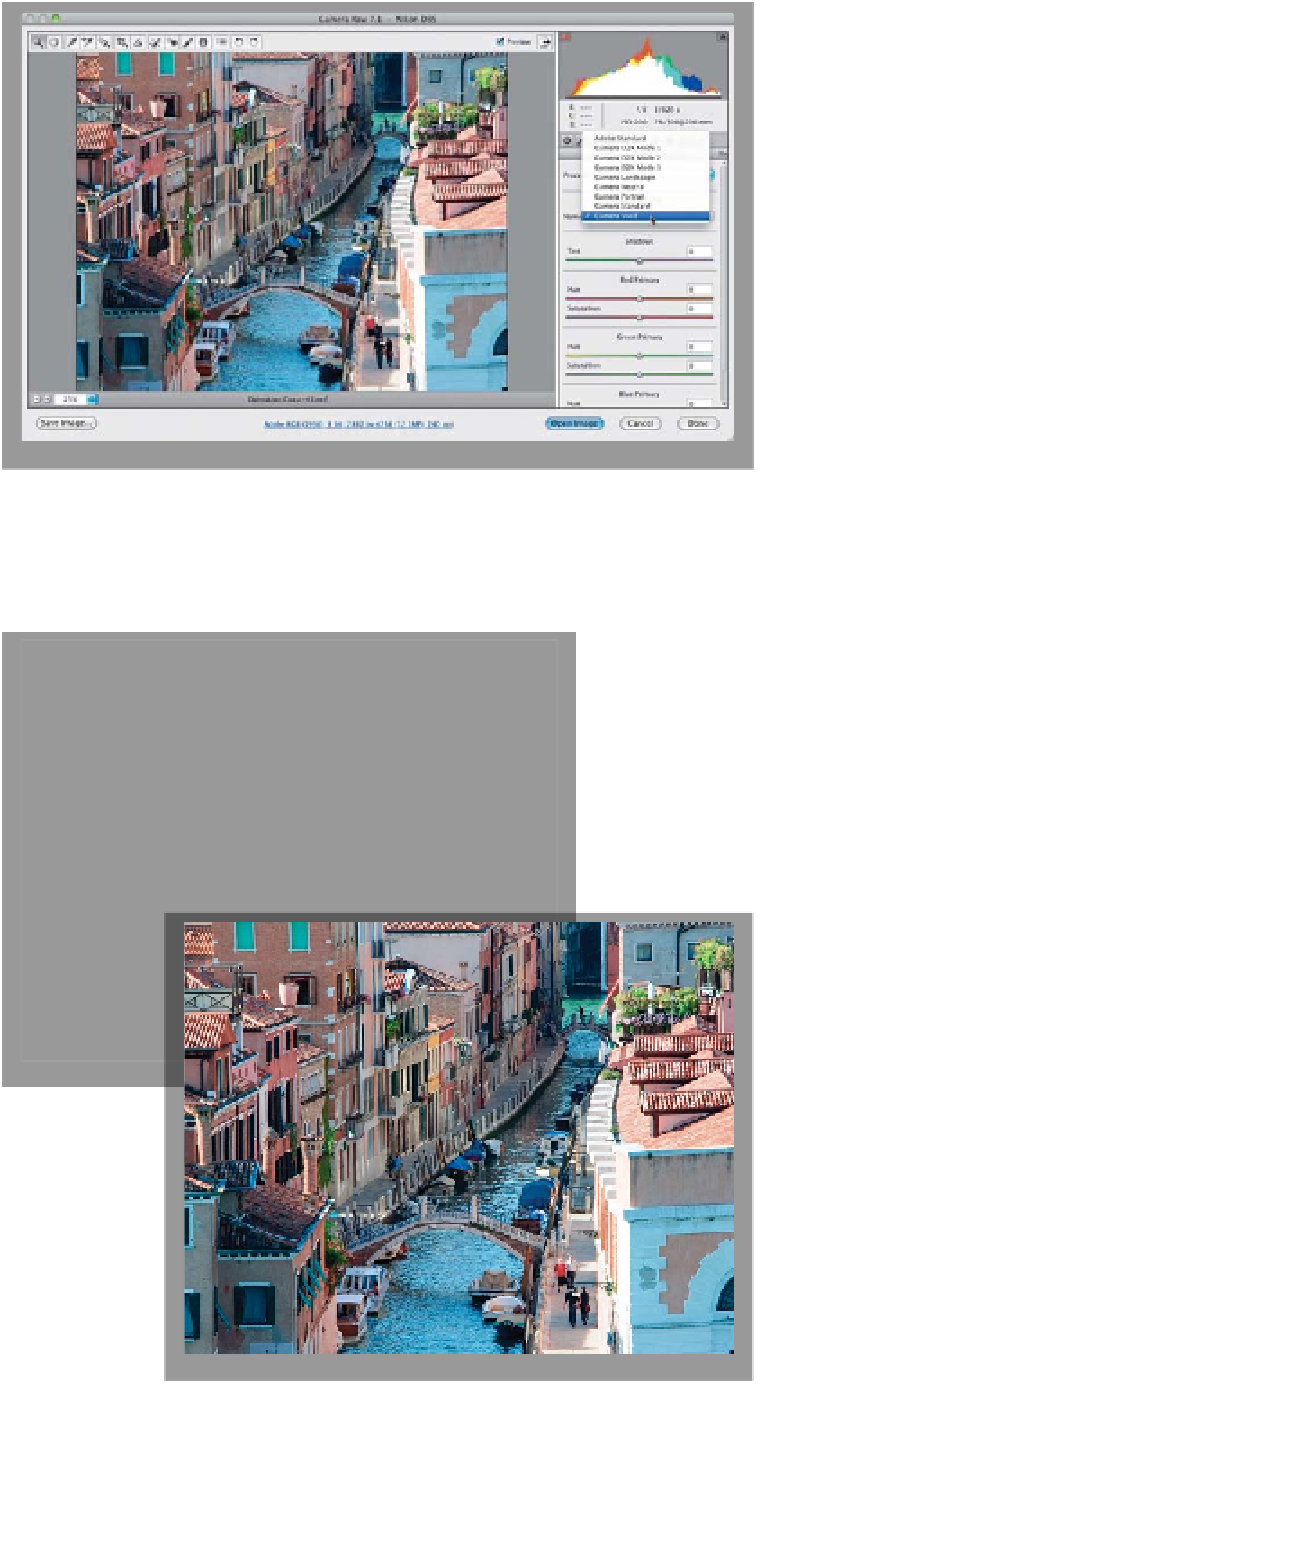
Step Three:
Depending on the individual photo you're
editing, Camera Standard might not be
the right choice, but as the photographer,
this is a call you have to make (in other
words, it's up to you to choose which
one looks best to you). I usually wind up
using either Camera Standard, Camera
Landscape, or Camera Vivid for images
taken with a Nikon camera, because
I think Landscape and Vivid look the most
like the JPEGs I see on the back of my
camera. But again, if you're not shoot-
ing Nikon, Landscape or Vivid won't be
one of the available choices (Nikons have
eight picture styles and Canons have six).
If you don't shoot Canon or Nikon, or one
of a handful of other cameras, then you'll
only have Adobe Standard, and possibly
Camera Standard, to choose from, but
you can create your own custom profiles
using Adobe's free DNG Profile Editor
utility, available from Adobe at
http://
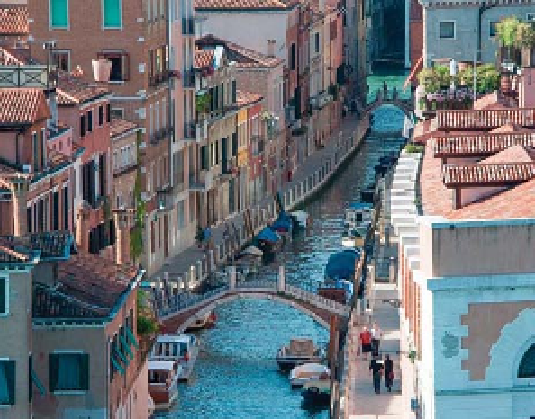
Step Four:
Here's a before/after with only one thing
done to this photo: I chose Camera Vivid
(as shown in the pop-up menu in Step
Three). Again, this is designed to rep-
licate the color looks you could have
chosen in the camera, so if you want to
have Camera Raw give you a similar look
as a starting point, give this a try. Also,
since Camera Raw allows you to open
more than one image at a time (in fact,
you can open hundreds at a time), you
could open a few hundred images, then
click the Select All button that will ap-
pear at the top-left corner of the window,
change the camera profile for the first-
selected image, and then all the other
images will have that same profile auto-
matically applied. Now, you can just
click the Done button.
Before: Using the
default Adobe
Standard profile
After: Using the
Camera Vivid profile