Graphics Programs Reference
In-Depth Information
Before you jump into this start-to-finish project, you really need
to have already read the rest of this chapter, because I'm not going
Our Start-to-
to explain in-depth the stuff already covered in this chapter—I'm just
going to tell you what to do. This is a great way to take what you've
learned in this chapter and put it to use (plus, this is where everything
you've learned so far comes together). So, if you've read the rest of
this chapter, you've probably already gone to the downloads page and
downloaded these same video clips and photos, so let's get to work.
Step One:
Go to Mini Bridge and select the video
clips you want to use in your movie (you
can see the ones I used here in the Layers
panel in the next step). Then Right-click
on any of those selected clips, and from
the pop-up menu that appears, go under
Photoshop, and choose
Load Files into
Photoshop Layers
. In just a minute or
so, you'll see your clips, each appear-
ing on its own layer in the Layers panel
(they'll have a little filmstrip icon in the
lower-right corner of the thumbnail).
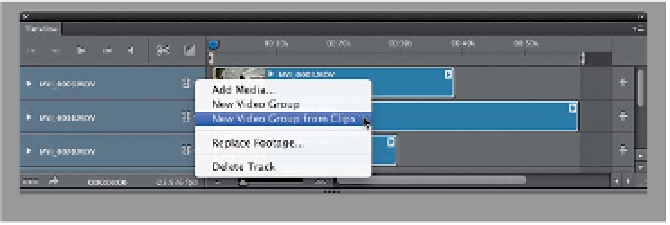
Step Two:
Of course, these videos are stacked
one on top of another, and we need them
to appear in our timeline one right after
another instead. So, select all your clips
(either in the Layers panel, or in the
Timeline panel, whichever you prefer) by
Command-clicking (PC: Ctrl-clicking) on
them, then click on the filmstrip icon to
the left of any of your selected clips in
the Timeline panel and, from the pop-up
menu, choose
New Video Group from
Clips
. Photoshop then rearranges the
selected clips so they appear one after
another. By the way, our movie is going to
be 60 seconds long, so if you want, you
can move your Set End of Work Area bar
to the 60-second mark, just to save you
some time (see page 370 for more on
your Work Area).
(Continued)